Build a "smart container app" to monitor food shipments with NB-IoT, Node and Pusher
Time to read: 9 minutes
January 24, 2019
Written by

Containers are one of the many ways food is shipped to vendors around the globe. The food encounters various types of environmental changes before it reaches the consumer. These environmental changes could impact the quality of the product during the shipment.

Using Twilio’s Narrowband Developer Kit that was distributed at SIGNAL 2018 we will create a full-stack IoT prototype using the U.S. T-Mobile NB-IoT network. NB-IoT is a new radio network technology that has very minimal power requirements meaning devices can connect with a lifespan of 10 years in the wild. This environmental monitor will be used to track the temperature/humidity of a food shipment and infrequently send small packets of data to update a web application.
Hardware Requirements
- Twilio Developer Kit from T-Mobile Narrowband
- Twilio Narrowband SIM
- LTE Antenna
- Micro USB cable
- Lithium Battery
- Seeed Studio Temperature and Humidity sensor
Software Requirements
Prepare the hardware
If you are unfamiliar with the Twilio Narrowband developer kit check out how “Pioneer NB-IoT with Twilio’s Alfa Development Kit”. This is a great primer for understanding how to connect to T-Mobile’s NB-IoT network with Twilio.
First take out the required components from the developer kit.
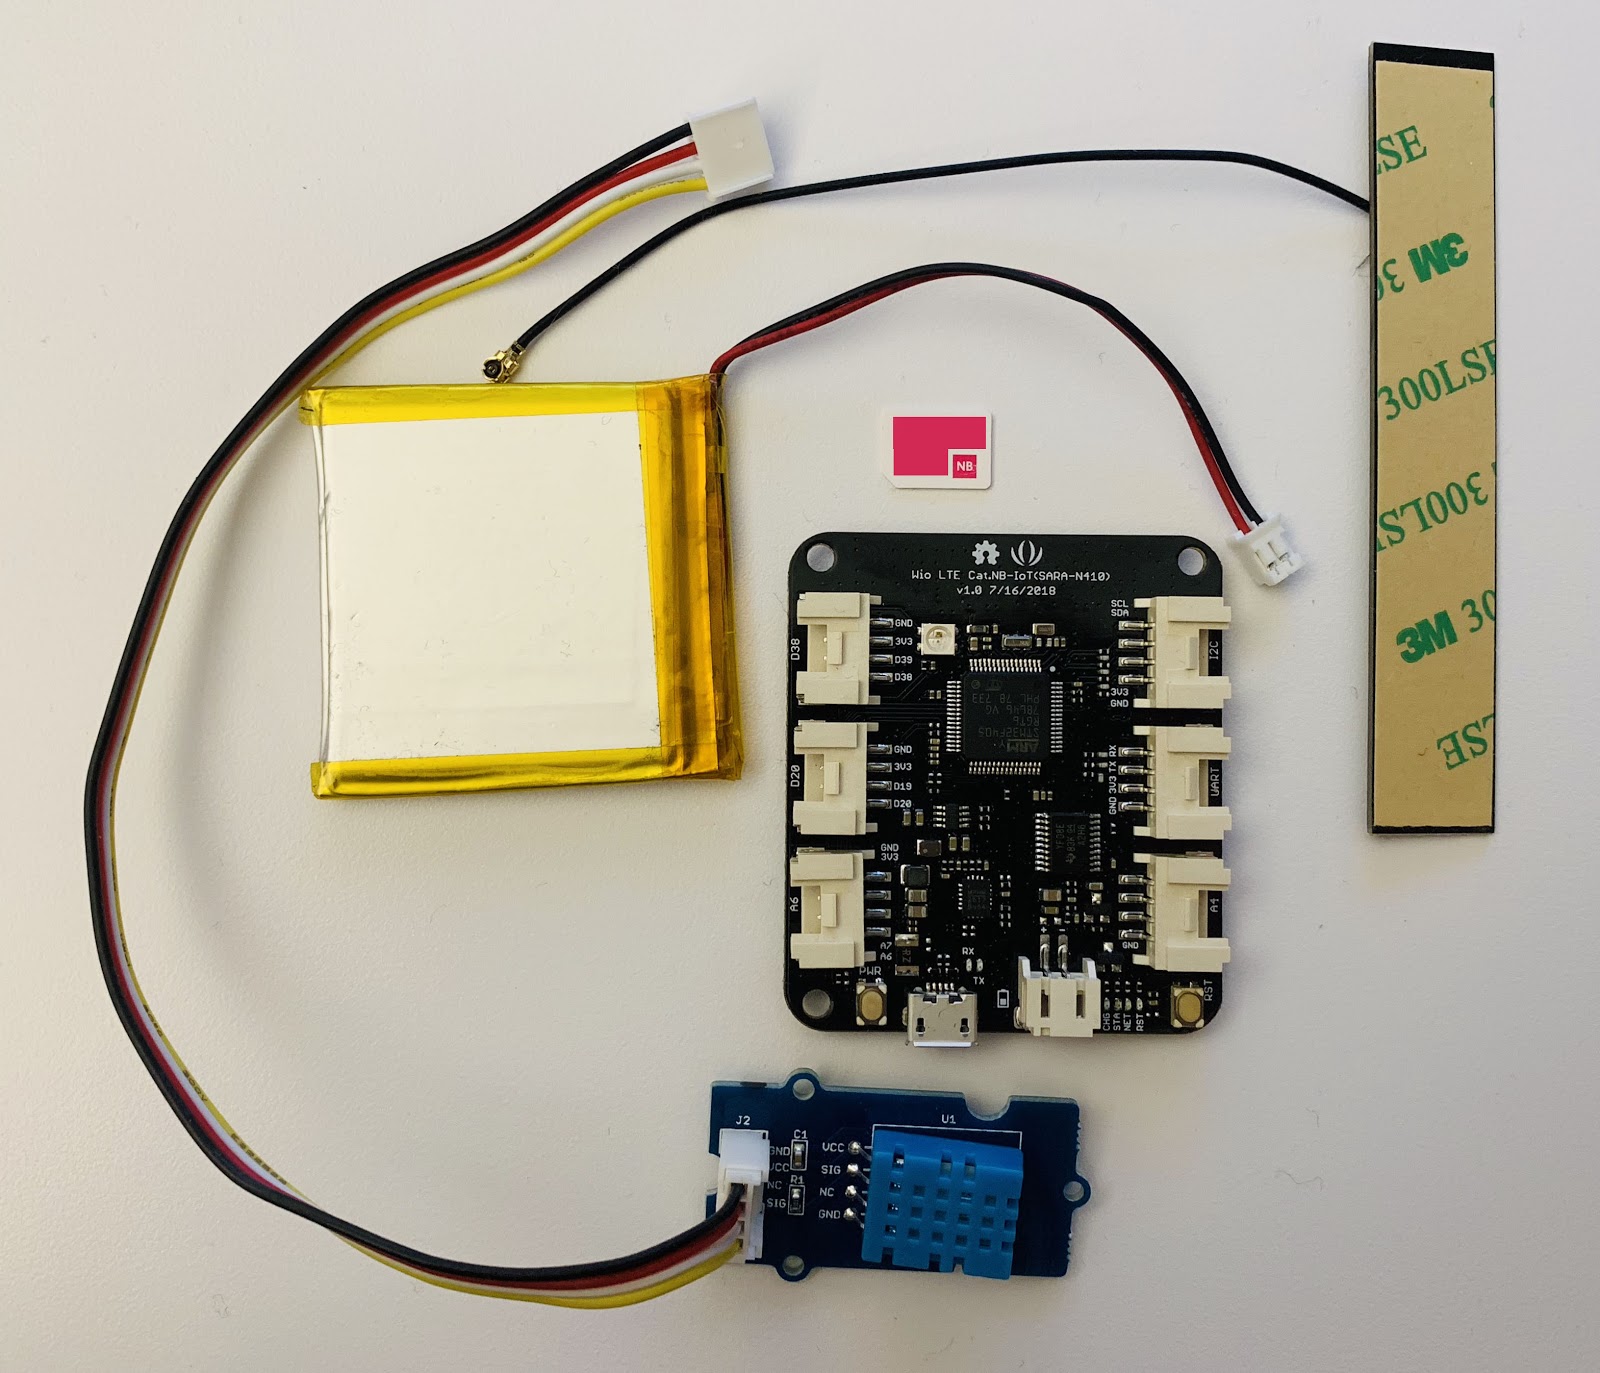
Attach the Seeed Studio Temperature and Humidity DHT11 sensor.
Open the Arduino IDE. This developer environment is used to program the developer board.
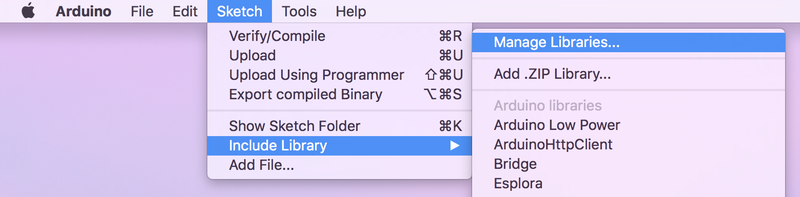
We will need to download the Grove Temperature and Humidity Sensor library by Seeed Studio to program the DHT11 sensor. Navigate to Sketch > Include Library Manage Libraries.
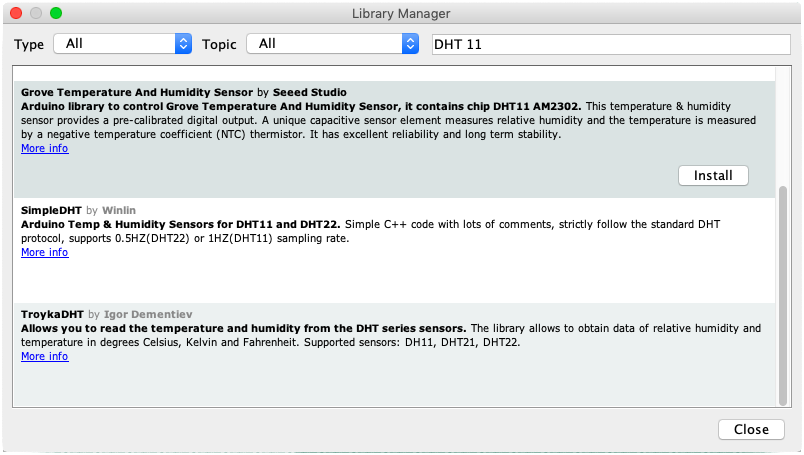
Search for and install the Grove Temperature and Humidity Sensor library by Seeed Studio.
After the library is installed we are ready to modify some code. Before we can do this we have to put the developer board into Bootloader mode. This step is necessary for uploading new code to the board. Once it is in Bootloader mode go back to the Arduino IDE.
Hack and upload

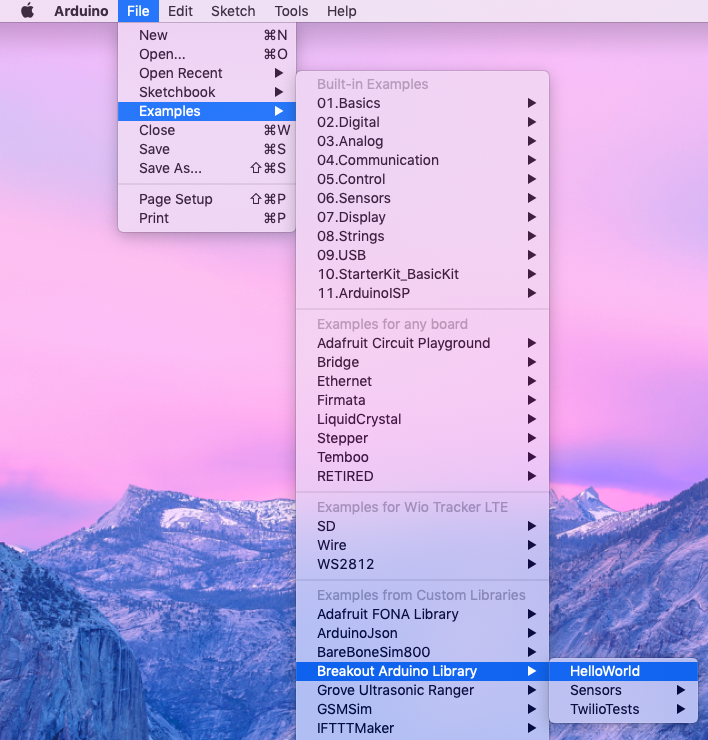
Open the “Hello World” example in the Breakout SDK Library folder.
- Navigate to File > Examples > Breakout Arduino Library > Hello World
At the top of the file, underneath #include <stdio.h>, add the DHT11 sensor header file.
Define SENSOR_PIN and the type of temperature humidity sensor as DHT11. This sensor is apart of a family called DHT so it’s important to note that we are using the DHT11. Once defined now we can instantiate a new DHT instance for reading incoming data.
Navigate to the setup() function and add this line at the top of the function.
Create a new function between the setup() and loop() functions. Name this function sendDHT11.
Within the function, create the timing logic for reading the DHT11. Add a delay at the end of the block to take a reading every minute.
Add the temperature and humidity variables to the if-statement underneath the variable last_send.
Create a new char buffer named commandText. Use the snprintf function to create a new data string with the humidity and temperature data from the DHT11 sensor. This function will place the string in the buffer and it can be pointed to by the variable commandText.
This variable is then used point to the string and send a text command over the NB-IoT network using the Breakout SDK.
For testing purposes, there are two other things we should do 1) add the Breakout SDK psk_key and 2) alter the interval time for a more responsive example.
Let’s start by replacing the psk_key. Each development board has a unique SIM ICCID and Pre-Shared Key (psk). The psk for the board needs to be copied into the HelloWorld.ino sketch to the T-Mobile Narrowband network. Follow the instructions below to find your pre-shared key:
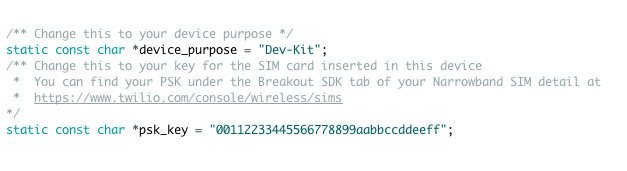
- Inside the HelloWorld.ino sketch find the line *psk_key
- Navigate to Programmable Wireless in the Twilio Console
- Click SIMs
- Find the Narrowband SIM that was previously registered
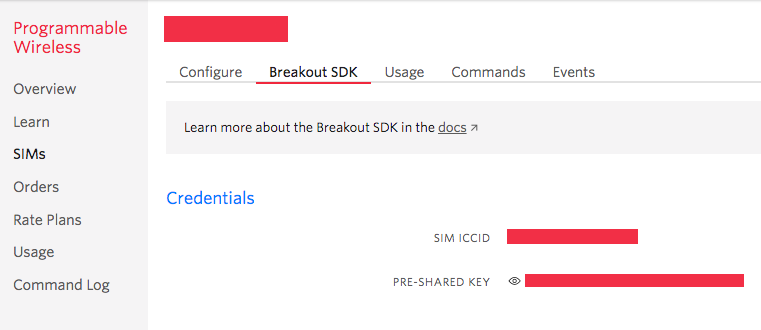
- Under the tab Breakout SDK find Credentials
- Where it says Pre-Shared Key (psk) click the eye logo to reveal the key
- Copy the psk
- Paste your psk into the HelloWorld.ino file in the code above
Next, change the setPollingInterval. This determines how often the Breakout SDK will poll for a new Command. Find the line breakout->setPollingInterval.

Change the ‘setPollingInterval’ interval from 10 to 1. This will change the polling time from 10 minutes to 1 minute.
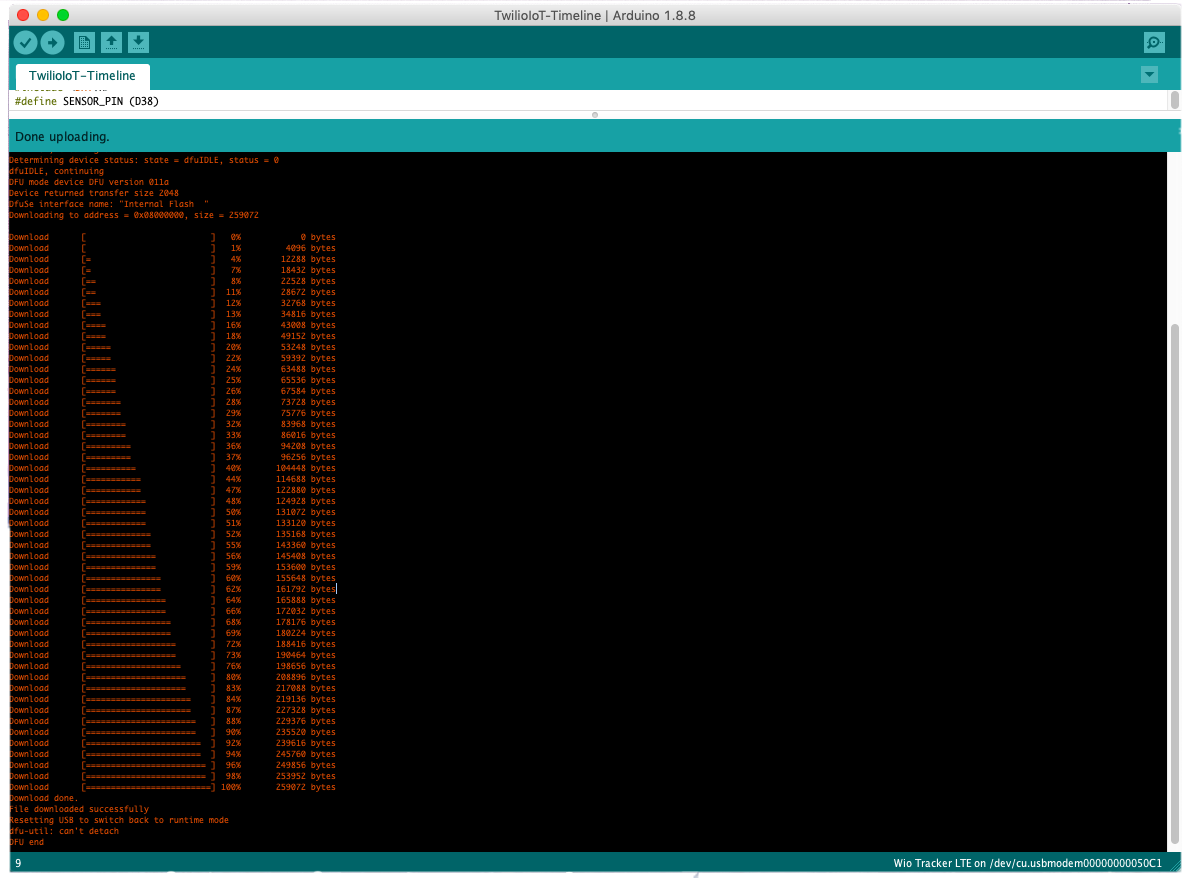
With the board still in Bootloader mode, upload the code to the developer board.

The output of the uploading process should look something like this.
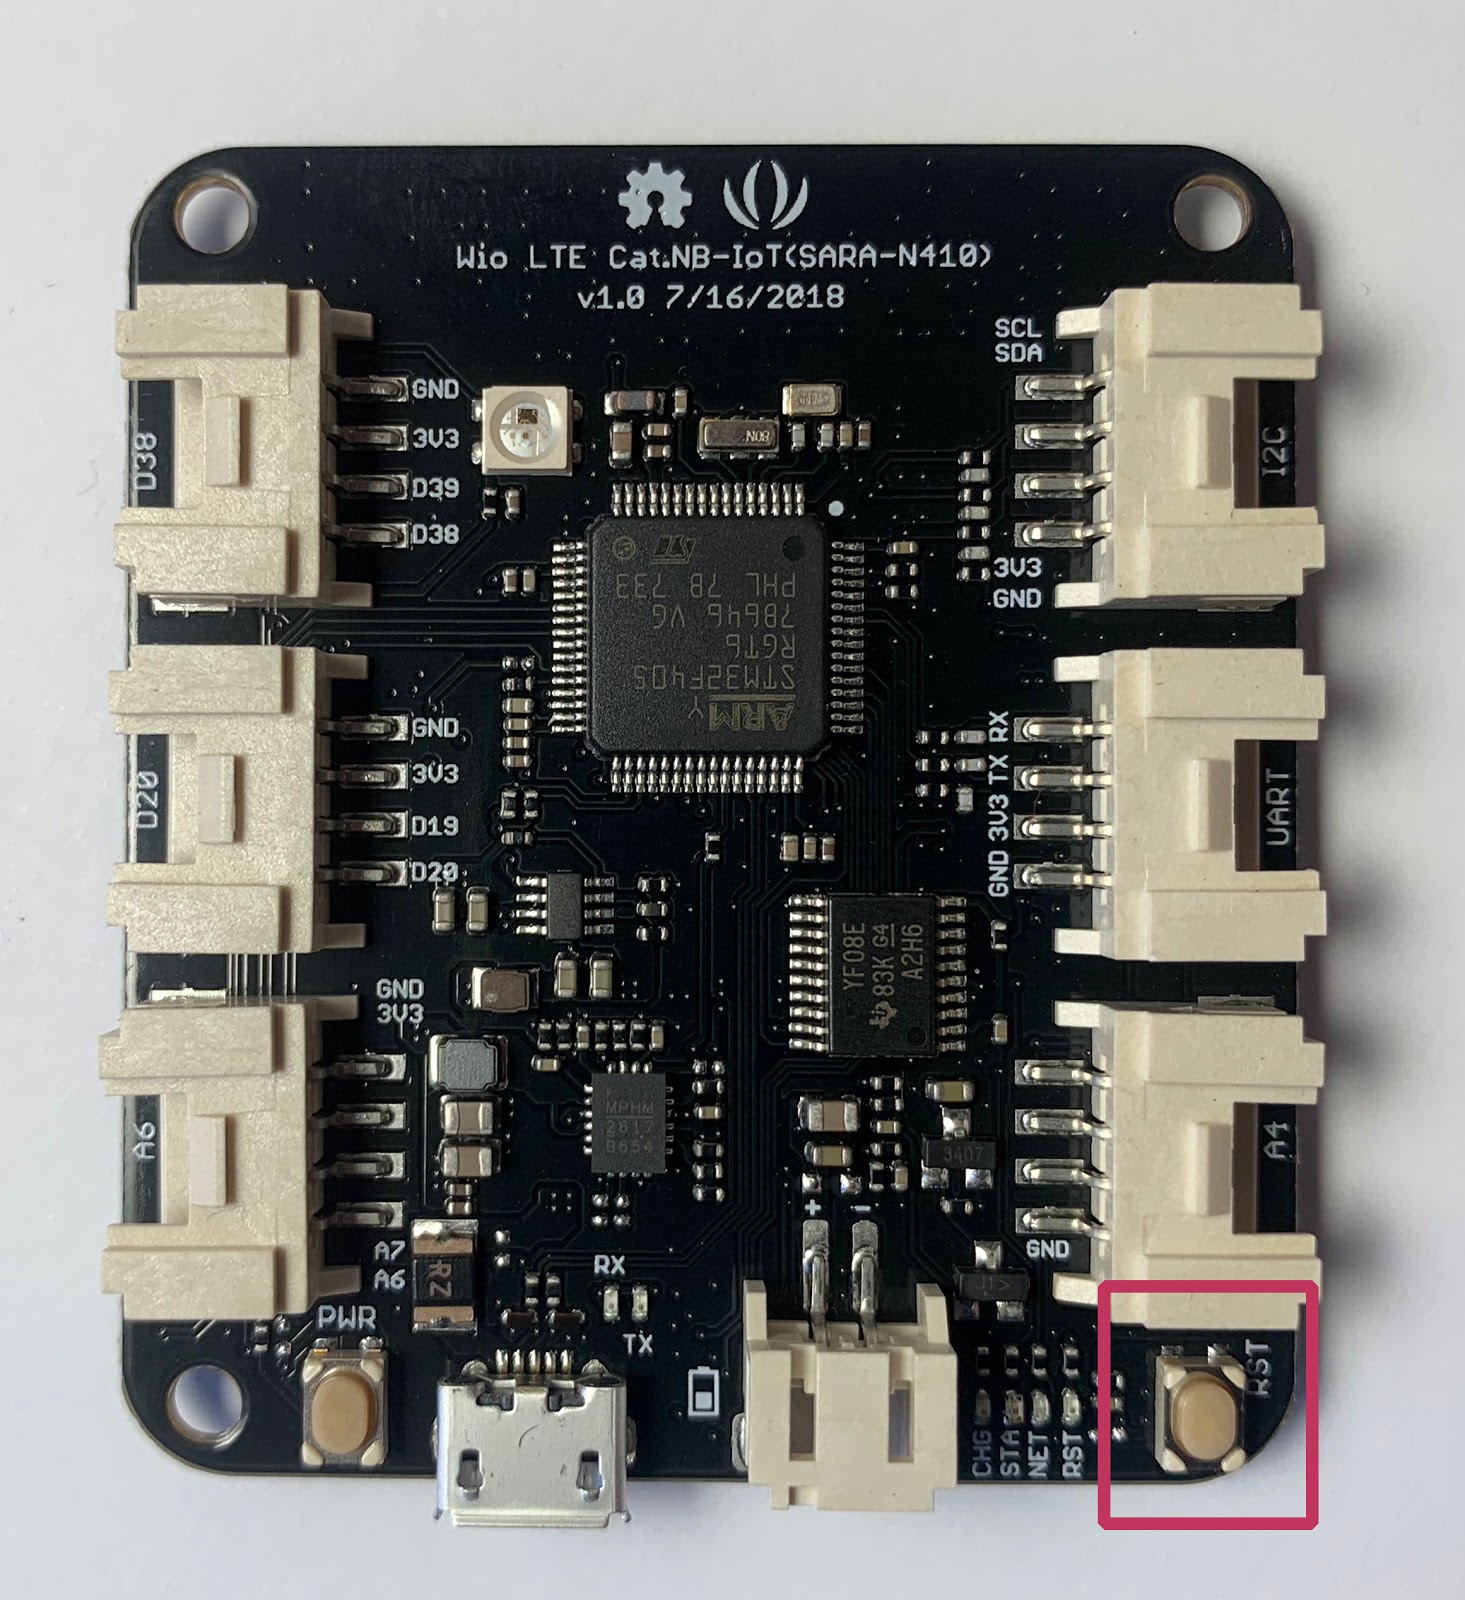
Press the RST button on the board to reset the board and start the new program.
Open the Serial Monitor and the registration process will start.
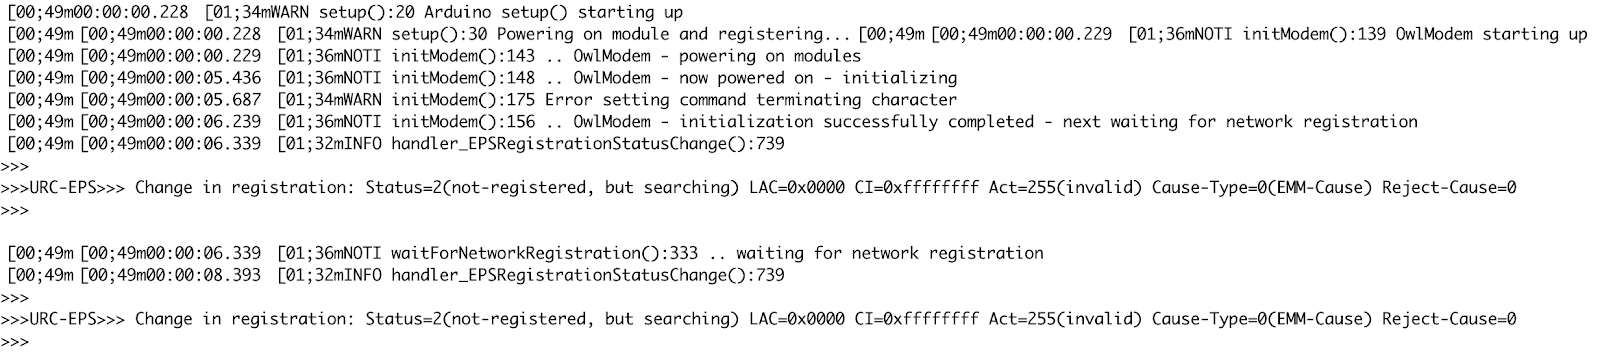
After a short period of time, the developer board will connect to the Breakout SDK.
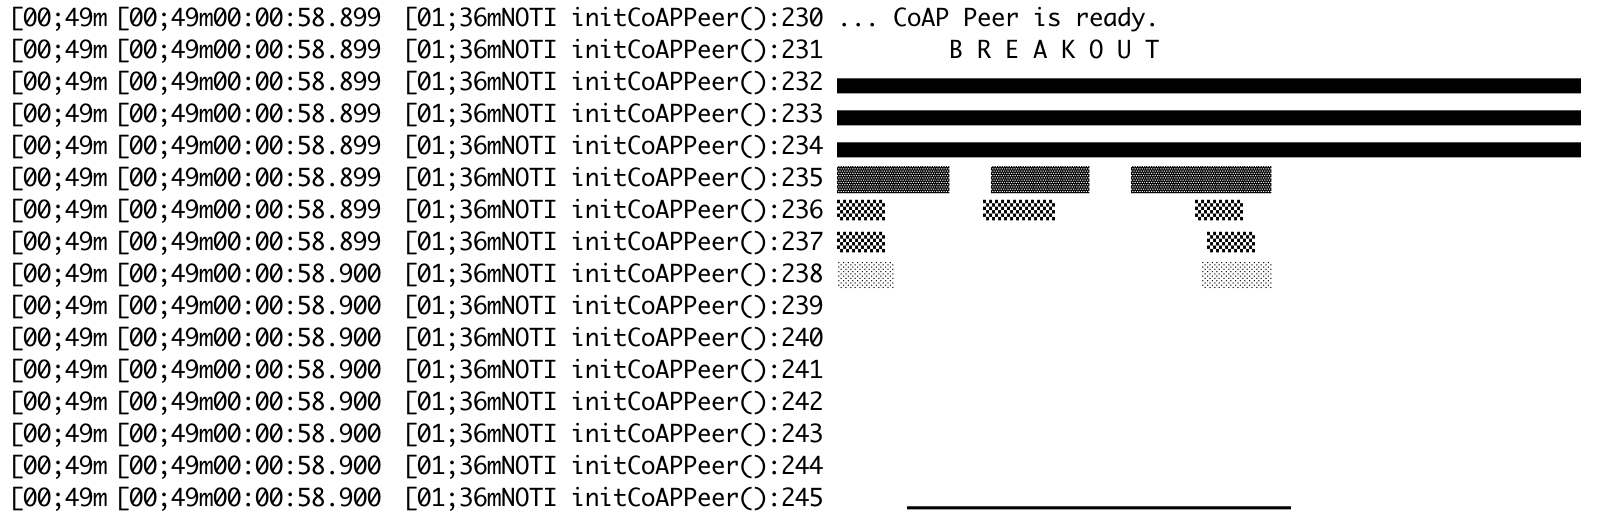
Once connected to the Breakout SDK, the DHT11 will initialize and the temperature and humidity data will start to flow in the Serial Monitor.

Below is the completed program as a reference. This code can also be found on the TwilioIoT GitHub.

Getting more information on each shipment would provide more insight into how fresh the food is during its journey. The data from inside the shipment is sent over the NB-IoT network using the Breakout SDK. The next step is to create an application that can receive the data and use Pusher to update a web page. The completed code can be found on GitHub.
Create a new folder in the directory and then create a new Node application using npm.
We will need a few npm packages. for this project. Find package.json and paste in the follow code.
Next let’s install them.
Great! Now we’re cooking.
How do you connect the server with the client?

Now that the data is being sent from board using the Breakout SDK, we need a mechanism to push the data received by the server to the client. For this we will use the Pusher API. This API makes it easier for developers to integrate bi-directional communication via WebSockets for web and mobile applications. Go to Pusher and sign up for a free account.
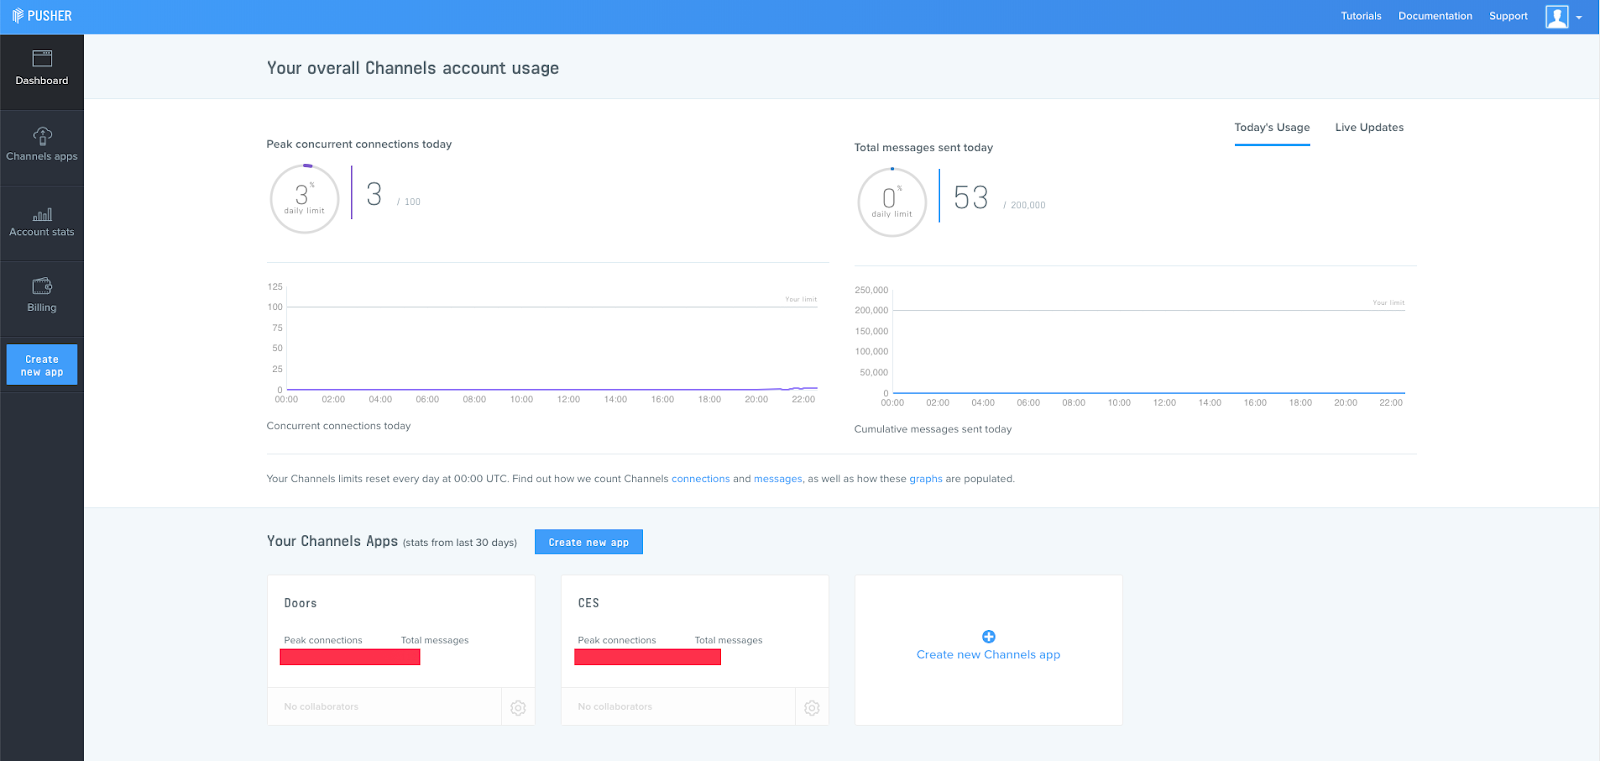
Once the signup process is complete, Pusher will redirect to the project Dashboard. At that point observe the menu on the left side of the page.

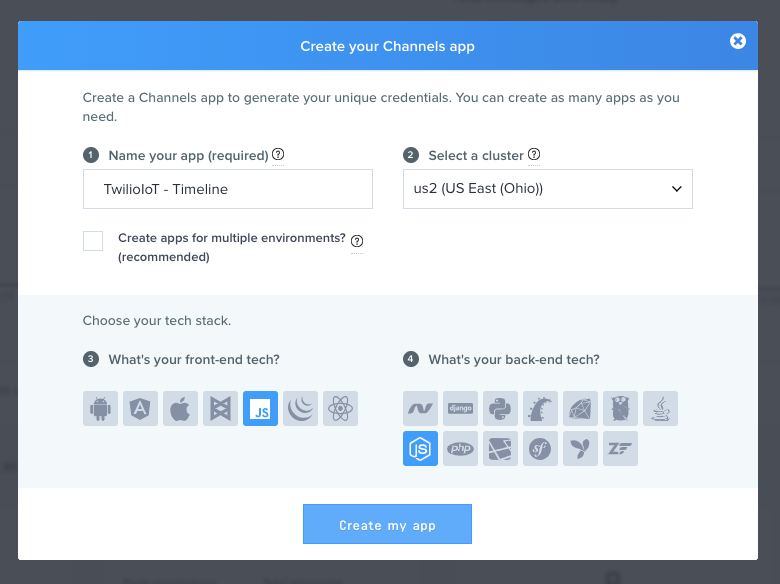
Click Create new app to create a new Channels application. Provide a name for the app and select a cluster where the application will be hosted. Select Javascript as the front-end tech and Node.js as the back-end tech. After filling out the necessary details press Create my app.
Pusher will redirect to the Dashboard once the app is created.
Press the Channels Apps in the navigation bar on the left.

A new menu will appear with all of Channels apps associated with the account. Click the application we just created to go to the application’s dashboard.
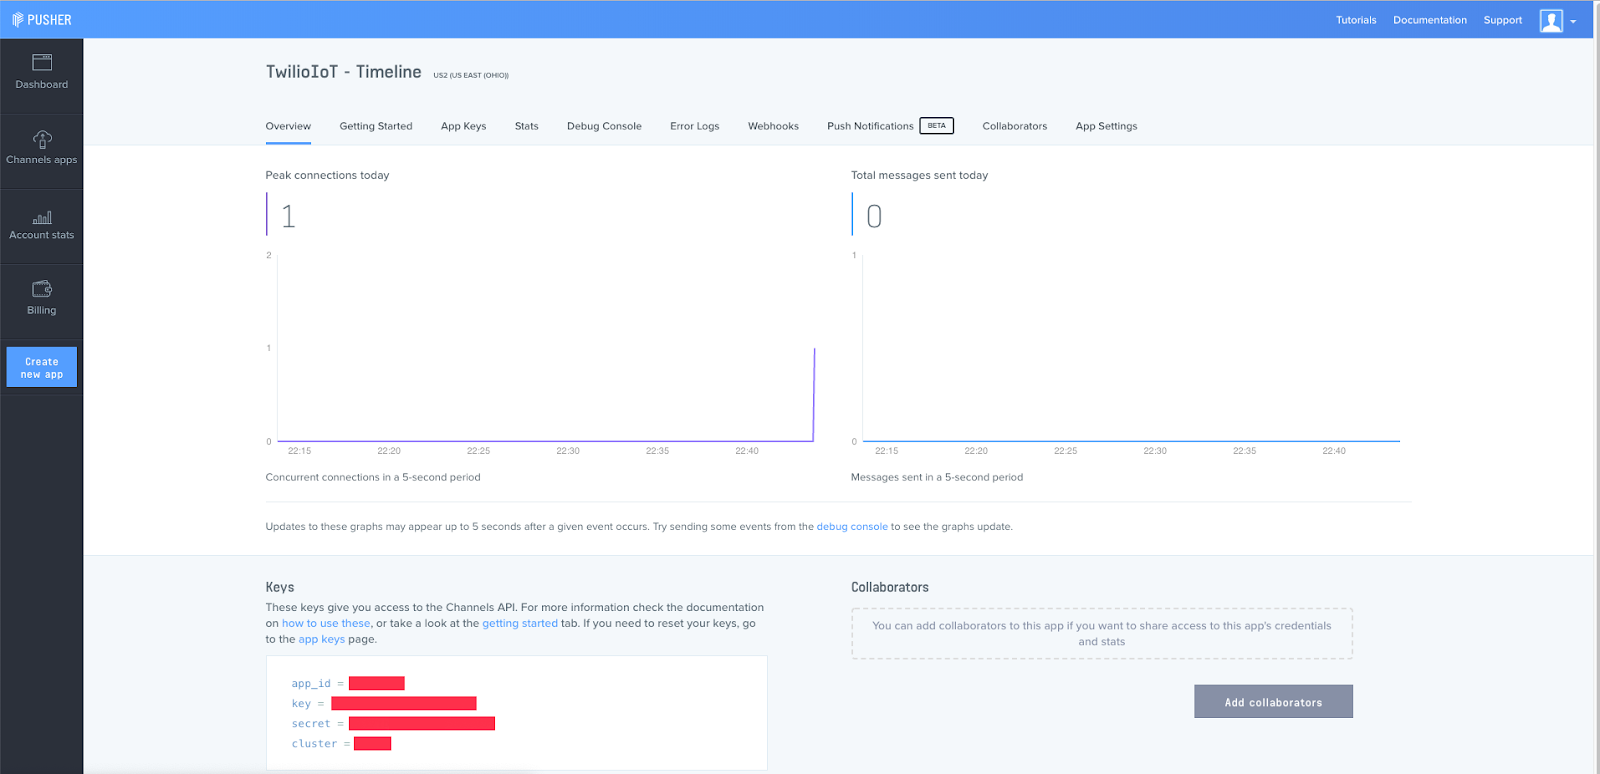
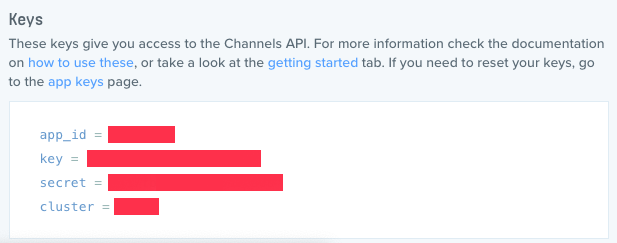
Once at the Channels dashboard we need to copy the Pusher credentials. They can be found at the bottom of the page. These credentials will be used in a future step.
Create the server and listen for messages
The server is the connective tissue between the outside world and the web. All of the Commands being sent over the NB-IoT network will be received using Node and Express that we will create together. Within the server, we will create a specific route to receive the data and pass to the client using Pusher.
In the project folder we created in the previous step, create a new server file called server.js.
Open the file and add the following libraries.
Under the required libraries,instantiate Pusher. Find the credentials that were previously copied and add them to the file.
Create a new Express instance that returns middleware that is json compatible. This will allow us to properly parse the incoming Commands from the Narrowband SIM Webhook we will set up later.
Define the path of the client-side application.
Create a POST method route named “/fromSIM”. This route receives a json formatted request from an incoming Command via a Webhook. Within the method route the newCommand variable is used to parse the json and get the data from req.body.Command. The variable is then pushed from the server-side and to the client-side by using pusher.trigger from the Pusher library.
Export the application using module.exports.
Set up the server to listen for incoming Commands on local port 9050.
Start the server.


The client-side is where the Command data will be received from the server. A function will receive the data from the server, and it will dynamically create new HTML elements. These elements will display the temperature and humidity readings of the remote IoT device.
Create a file named app.js inside the public folder. The assets for this post can be found on GitHub.
Open app.js and add a Immediately-Invoked Function Expression.
Within the function, we want to add the Pusher code that connects the front-end to the back-end. This will subscribe to a specific <div> within the HTML file and bind the data from the server to a specific HTML element.
Create a function within the main function named newCommandReceived. This function will receive the Command data from the server-side and dynamically generate new HTML elements.
The variables {{name}} and {{command}} inside the HTML element are replaced with new temperature and humidity data reading. This is done using data.name and data.command.
A new <div> is created using document.createElement(‘div’), and and then we append the new temperature and humidity data readings to a <div> with the class command.
This new <div> is then dynamically added to the <div> with the class commands-list.
Incoming Commands will dynamically add new <div> blocks beyond the dimensions of the web page. To fix that we need to find out the number of <div> tags that have been dynamically created and limit the number available on the page. So when there are 6 <div> tags on the page, 5 will be erased and the 6th will start a new list. This is quick hack to keep everything on one page.
Great work! Let’s mock up the HTML so it can be dynamically altered.
Set up the HTML template
The HTML file is the skeleton of the web application and with the previous code it can be dynamically altered. Next, we have to create the template that will update when new readings are received.
Create a new file named index.html in the public folder.
Below is the entire index.html file. We will not dive into every aspect of the file but we will focus on the highlighted section of the code.
This section of HTML is dynamically altered by new data readings from the Breakout SDK. When the data is received by the Express server it is routed to a function and is passed to the client-side. This function dynamically adds HTML elements and the data is added to the variables {{name}} and {{command}}. When the process is complete a new block of HTML is created with the temperature/humidity reading from the remote IoT device.
The stylesheet used for the web app, style.css, can be found in the TwilioIoT GitHub repository for this post.
Connect the two worlds with a webhook
Connecting the Breakout SDK to the Node server is the last step needed to connect all of the applications elements.
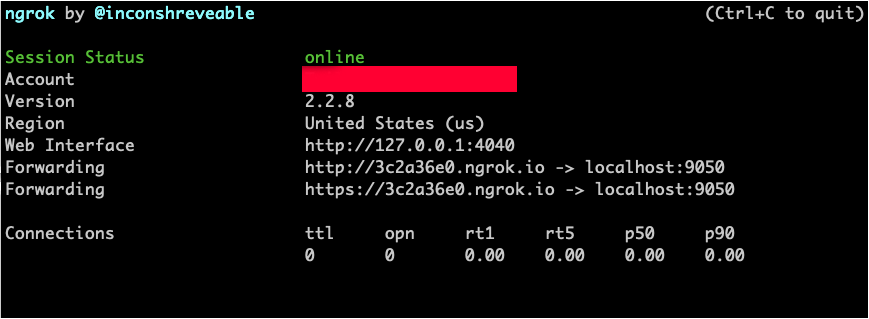
When the device sends a machine-to-machine Command to Twilio a webhook is sent to the Commands Callback Url. Ngrok will be used to receive the webhook and route it to the server running locally.
Start a new ngrok instance on the same port where the server is running.
Copy the Forwarding url that was created with ngrok. Note that the Forwarding url will change each time ngrok is started. This behavior can be changed by defining a subdomain using a command-line flag.
Next we want to add Forwarding url to the Commands Callback Url.
- Navigate to Programmable Wireless in the Twilio console
- Locate the Narrowband SIM that you previously registered under SIM
- Under the Configure tab you will find the Commands Callback Url
- Paste the ngrok Forwarding address into text box and add the previously created server route to the end of the url.


Open a web browser and type in localhost:9050.
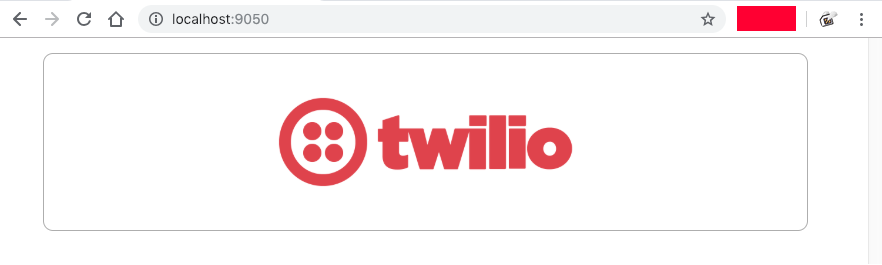
Watch the machine-to-machine Commands reach the Node server.

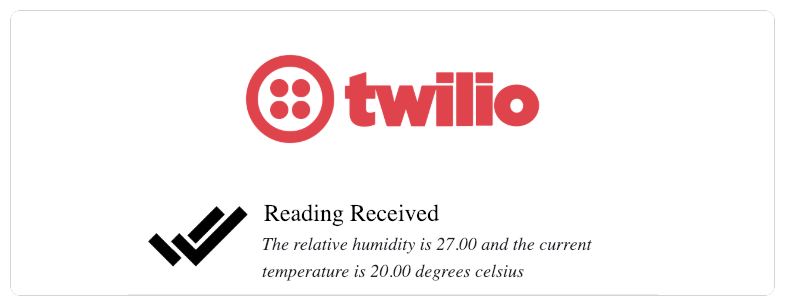
And this is what it looks like when the data reaches the web browser.
You just create a full-stack IoT prototype!

Prototyping the future of IoT
IoT is not just software, hardware, or even cloud technology. It is about interconnectivity with intent. Developing experimental prototypes like this “smart container app” is how an individual could bring their idea and create an MVP. After several iterations it could potentially become a production ready device.
Environment tracking could be applied to several types of industries such as:
This project, along with other projects, can be found on the TwilioIoT GitHub. If you are interested in learning about other pieces of hardware that can send machine-to-machine (M2M) Commands with TwilioIoT check out the Wireless Machine-to-Machine Quickstarts.
Feel free to reach out with any questions or curiousity. Drop me a line if you have any cool IoT projects.

Related Resources
Twilio Docs
From APIs to SDKs to sample apps
API reference documentation, SDKs, helper libraries, quickstarts, and tutorials for your language and platform.
Resource Center
The latest ebooks, industry reports, and webinars
Learn from customer engagement experts to improve your own communication.
Ahoy
Twilio's developer community hub
Best practices, code samples, and inspiration to build communications and digital engagement experiences.