Customize your Flex-Zendesk Integration
The setup and configuration outlined in Create your Flex-Zendesk Integration and Manage Flex-Zendesk Call Flows describe how to get up and running with the default behavior in mind. However, you might want to customize both this integration experience as well as call flows.
Info
Do you still need to set up your Flex-Zendesk Integration? Check out our guide for configuring your Zendesk instance for Flex!
Customize the default call flow in your Flex-Zendesk integration by:
- Creating an Interactive Voice Response (IVR) to collect a ticket number from the caller
- Collecting further information about the Ticket or Caller during the flow that you would want to tag the Ticket with .
- Looking up an existing Ticket if a valid ticket id is provided, or
- Creating a new Ticket from the caller's input if there is no pre-existing Ticket or when an invalid Ticket number is provided
To accomplish this, do the following:
- Create a Studio flow to introduce IVR and collect a Ticket Number from the caller
- Pass Zendesk's Ticket Number to the Flex-Zendesk integration by using a custom Task attribute called
zd_ticket_id - Pass Tags to be added to Zendesk Ticket by using a custom Task attribute called
zdCustomTags - Re-configure the Flex Zendesk Integration for creation and navigation of Ticket, if not already done in the configuration stage
Info
Remember: Flex is a Programmable Application Platform, so you can customize Flex to any extent using the Flex Plugin Model, and those changes will be reflected in your Zendesk integration as well. The customizations in this guide refer to the enhancements in both the integration and the call flow itself.
If the call flow in your organization collects a ticket number from the customer on incoming engagement, you can use that information to screen pop the ticket to an agent when they accept the incoming task.
To do so, modify your Flex Flow in the Twilio Console, as described below.
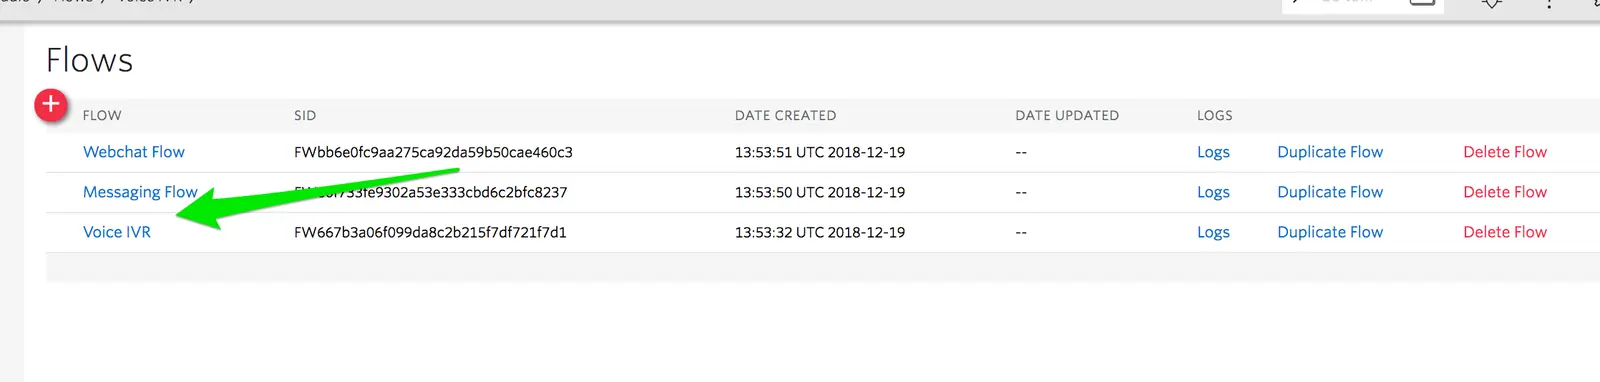
(1) From the Flex Flow screen, select "Voice IVR" flow
 |
|---|
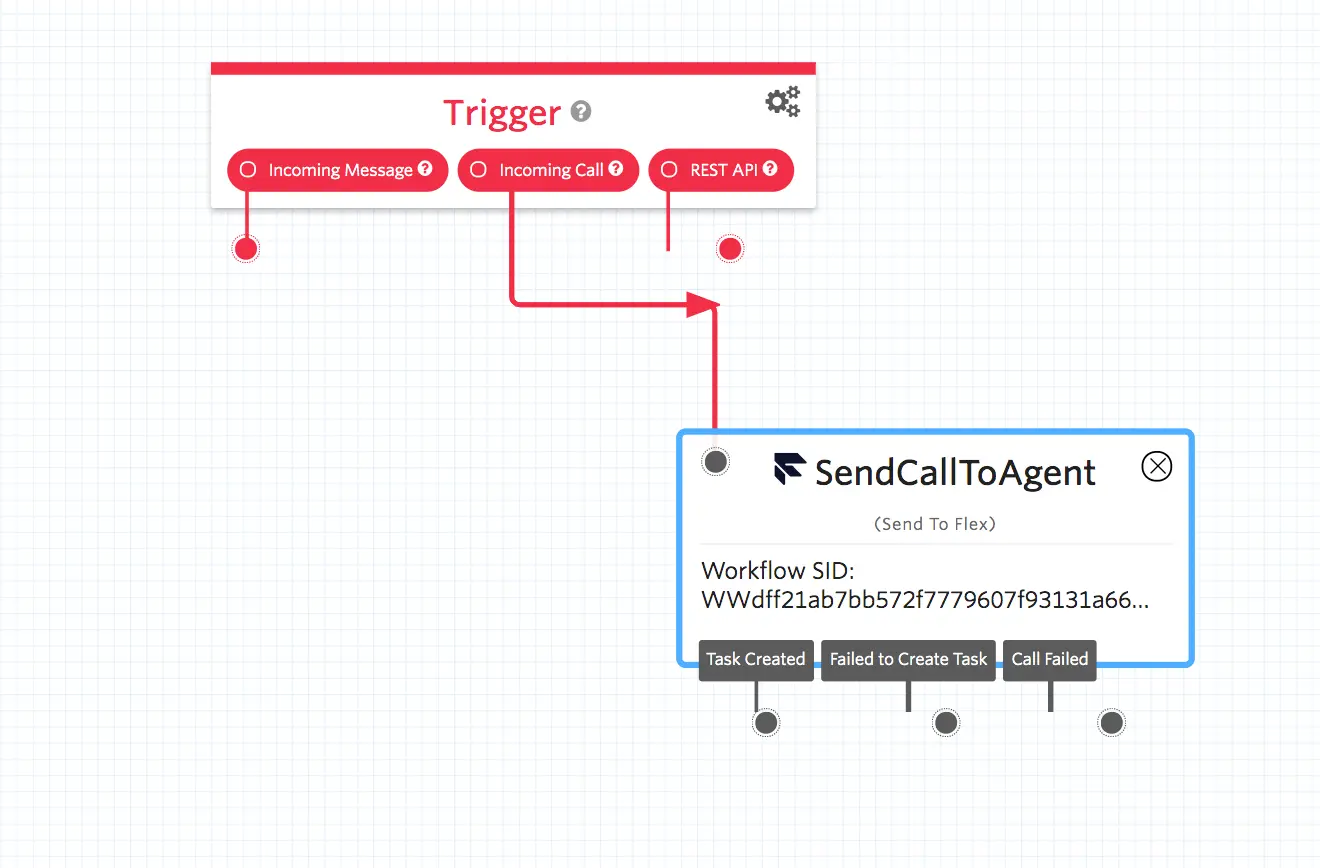
(2) Default "Voice IVR" flow looks like the one below
 |
|---|
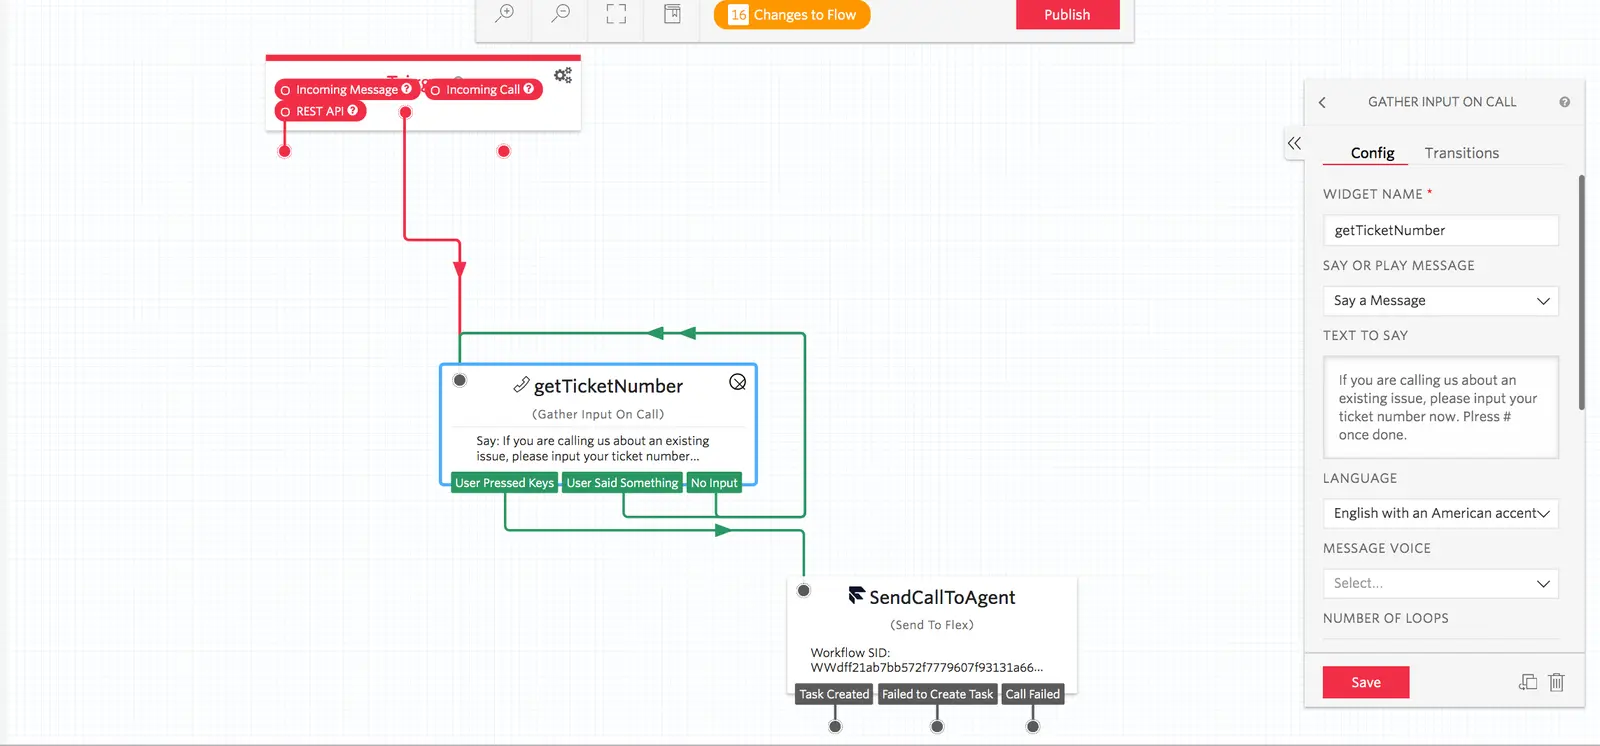
(3) Add a Gather Input on Call widget to the flow before "Send to Flex" widget, like shown below to collect ticket number from the caller. Let's name this widget "getTicketNumber'
 |
|---|
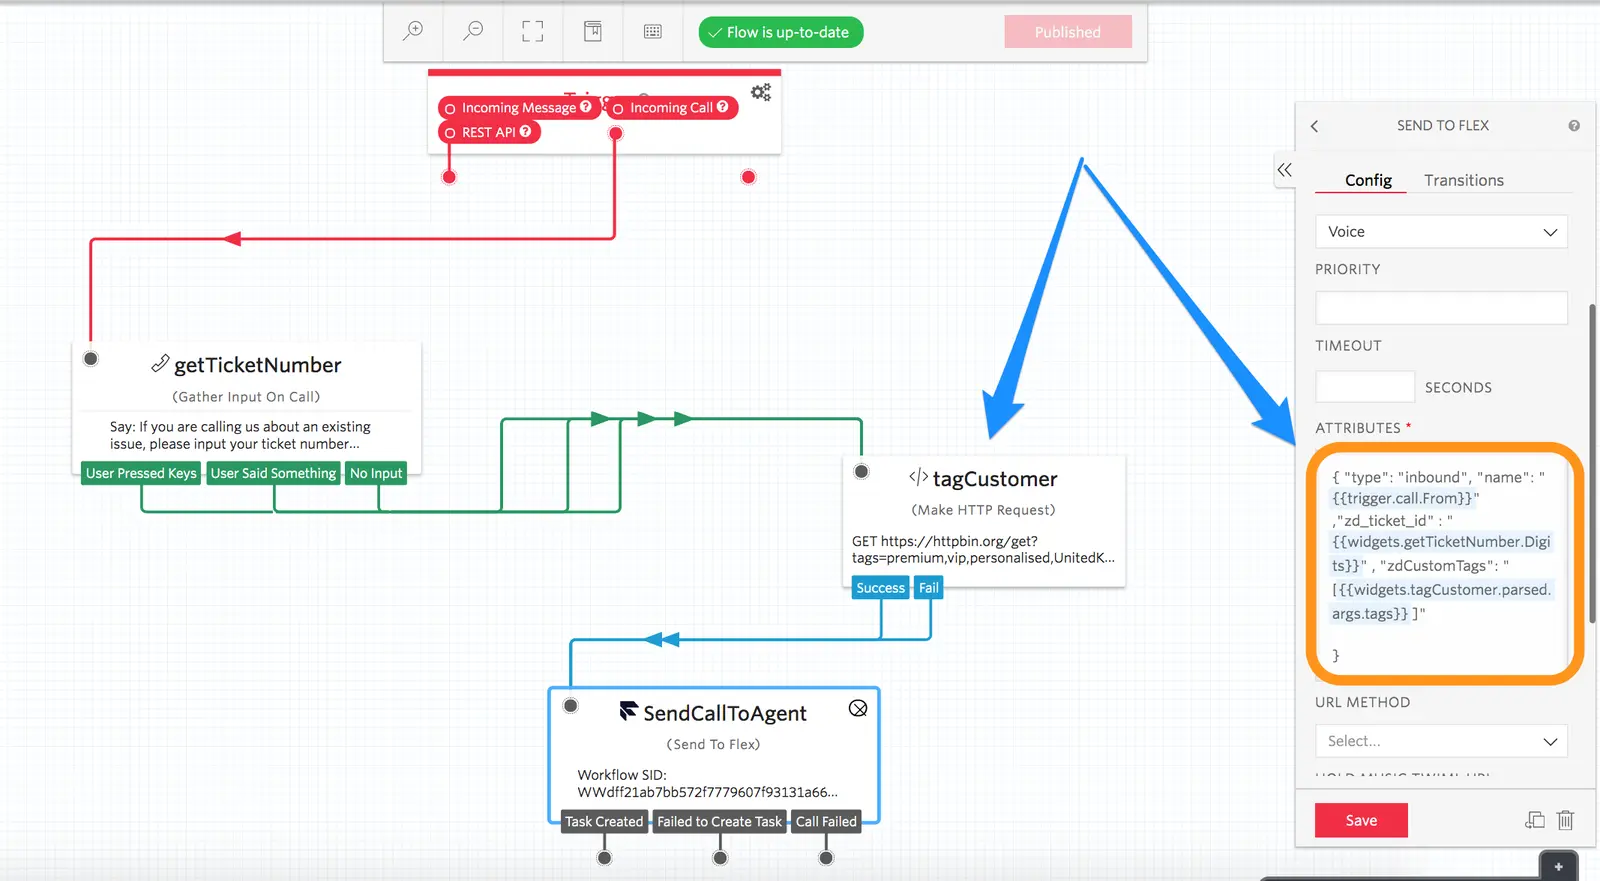
(4) Add the ticket number as a Task Attribute in the Send to Flex widget, as shown below
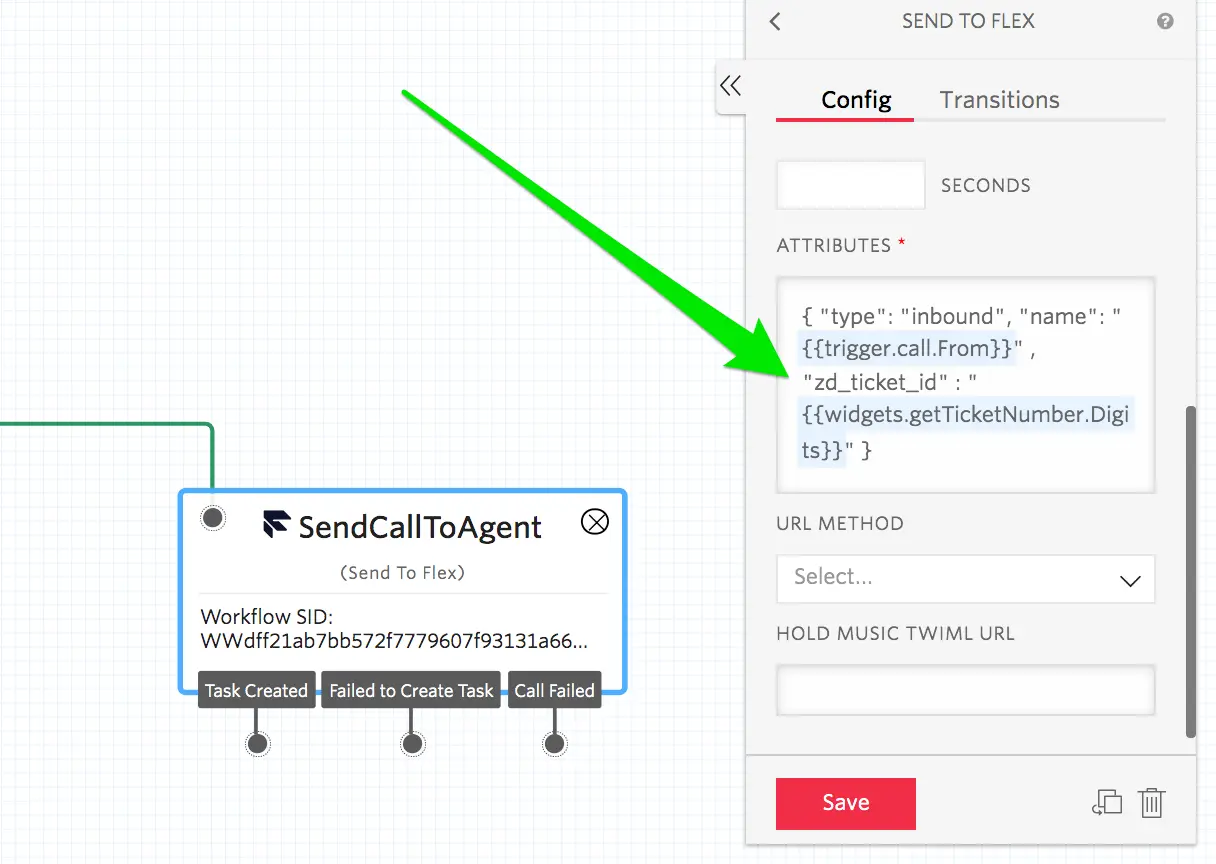
(5)The task attributes in "Send to Flex" widget after modification will look like the following
1{ "type": "inbound",2"name": "{{trigger.call.From}}" ,3"zd_ticket_id" : "{{widgets.getTicketNumber.Digits}}" }
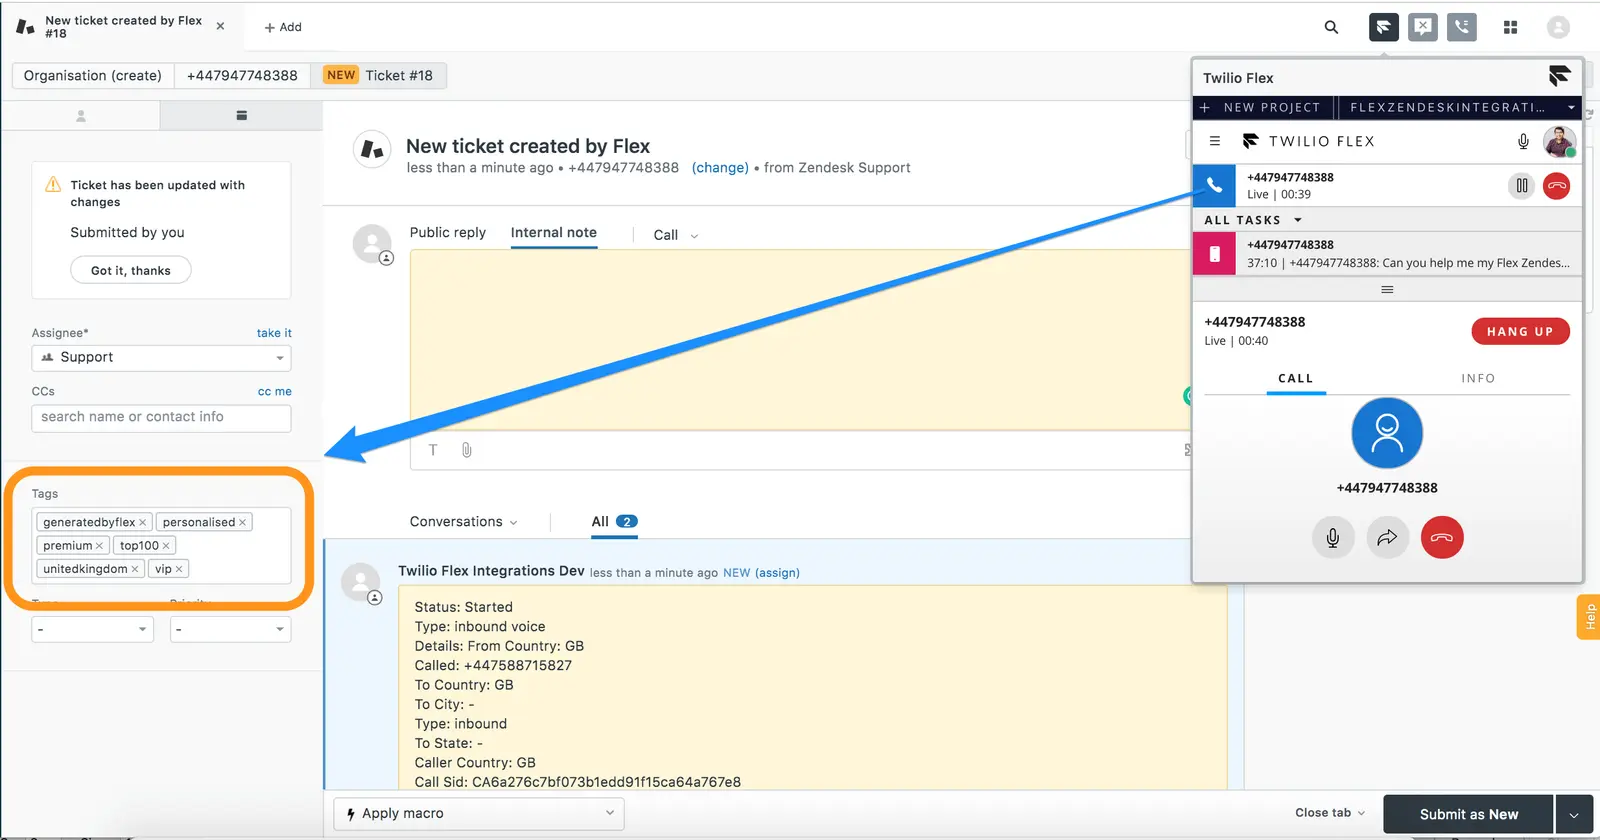
(6) If you now call your Flex Number and supply the ticket number, you should have the Ticket screen displayed instead of a new ticket. For the scenario when no ticket number is provided in the above IVR, or an invalid ticket number is provided, you would still have a new ticket number created and displayed on the screen
Info
While the above example shows the approach to collect Ticket number in an IVR, the same approach can be applied to any other channel. For example, you can collect Ticket Number using a Messaging Bot in any text-based channel like SMS, WhatsApp or Webchat and pass that Ticket Number as "zd_ticket_id" task attribute to Flex.
You can add any custom tags identified during your customer engagement flow by adding those tags to a task attribute named "zdCustomTags" made available to you.
(1) Modify your Studio Flex Flow to identify tags you want to add the ticket. Approach to identify tags depends on your Business Logic, and can be done either by automated lookups to your backend, CRM, external API or by explicit questions to the Customer - whatever works best for you.
An example is shown below demonstrating adding tags identified in the Studio Flow using a lookup before Send to Flex widget is called. In this example, we used the Http Studio widget viz. "tagCustomer" and got a list of tags in the parameter "tags"
 |
|---|
(2) Now add these tags to "zdCustomTags" task attribute in "Send to Flex" widget as shown below
 |
|---|
(3)The task attributes in "Send to Flex" widget after modification will look like the following
1{ "type": "inbound",2"name": "{{trigger.call.From}}" ,3"zd_ticket_id" : "{{widgets.getTicketNumber.Digits}}" ,4"zdCustomTags": "[{{widgets.tagCustomer.parsed.args.tags}} ]"5}
(4) If you now call your Flex Number, you should see tags attached to the relevant Ticket, like shown below
 |
|---|
Info
"zdCustomTags" supports multiple tags, so you can pass a list of all the tags you want to add.