Programmable Messaging Quickstart for C# with .NET Framework
Info
Ahoy there! All messaging transmitted using Twilio's messaging channels is treated as Application-to-Person (A2P) messaging and subject to Twilio's Messaging Policy. For detailed information on policy rules to ensure you remain compliant while using Twilio's services, see our Acceptable Use Policy.
Warning
Looking for .NET Core? We have a quickstart for that too!
With just a few lines of code, your .NET Framework application can send and receive text messages with Twilio Programmable SMS.
This C# SMS Quickstart will teach you how to do this using our Communications REST API and the Twilio helper library for .NET.
In this Quickstart, you will learn how to:
- Sign up for Twilio and get your first SMS-enabled Twilio phone number
- Set up your development environment to send and receive messages
- Send your first SMS
- Receive inbound text messages
- Reply to incoming messages with an SMS
Prefer to get started by watching a video? Check out our C# SMS Quickstart video on YouTube.
Info
Warning
If you are sending SMS to the U.S. or Canada, be aware of updated restrictions on the use of Toll-Free numbers for messaging, including TF numbers obtained through Free Trial.
You can sign up for a free Twilio trial account here.
- When you sign up, you'll be asked to verify your personal phone number. This helps Twilio verify your identity and also allows you to send test messages to your phone from your Twilio account while in trial mode.
- Once you verify your number, you'll be asked a series of questions to customize your experience.
- Once you finish the onboarding flow, you'll arrive at your project dashboard in the Twilio Console. This is where you'll be able to access your Account SID, authentication token, find a Twilio phone number, and more.
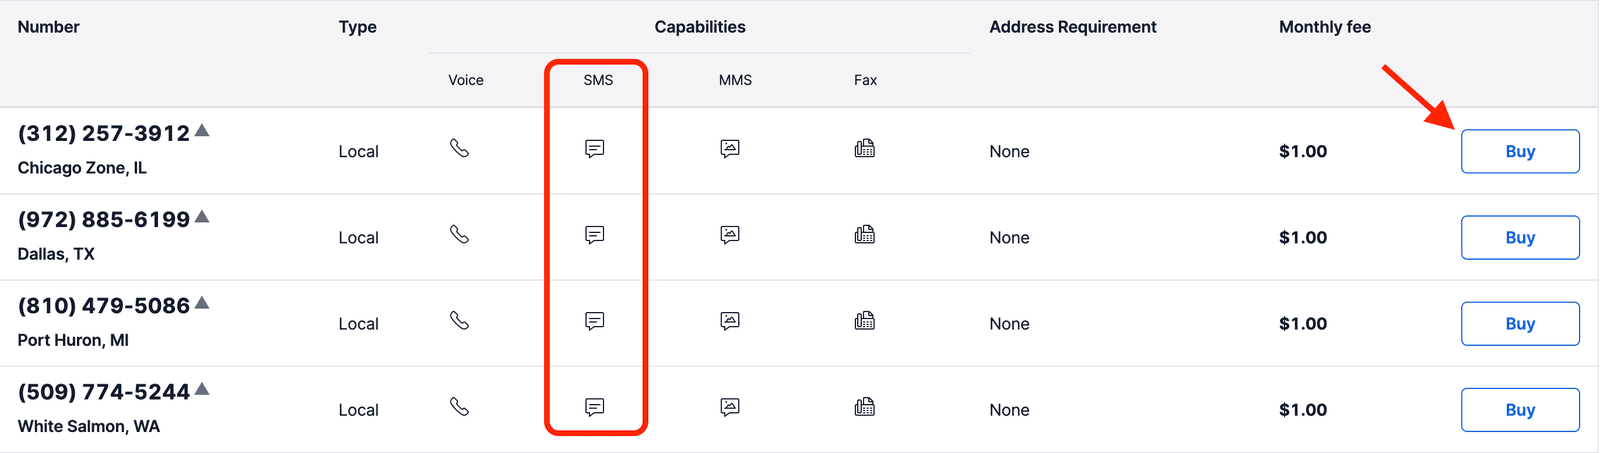
If you don't currently own a Twilio phone number with SMS functionality, you'll need to purchase one. After navigating to the Buy a Number page, check the SMS box and click Search.

You'll then see a list of available phone numbers and their capabilities. Find a number that suits your fancy and click Buy to add it to your account.
We'll need to use the Twilio CLI (command line interface) for a few tasks, so let's install that next.
The suggested way to install twilio-cli on macOS is to use Homebrew. If you don't already have it installed, visit the Homebrew site for installation instructions and then return here.
Once you have installed Homebrew, run the following command to install twilio-cli:
brew tap twilio/brew && brew install twilio
Info
For other installation methods, see the Twilio CLI Quickstart.
Run twilio login to get the Twilio CLI connected to your account. Visit https://www.twilio.com/console, and you'll find your unique Account SID and Auth Token to provide to the CLI.
Next, we need to install Visual Studio and the Twilio C# Helper Library.
If you have Visual Studio installed, you are ready to get going. Otherwise, you should download and install it now.
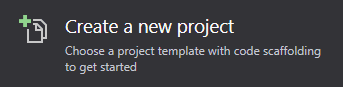
Once you have Visual Studio, open it up and create a new Console project. Click the Create a new project button:
And then choose Console App (.NET Framework) from the list of project templates:


Then use the NuGet Package Manager to find and install the Twilio REST API helper library.

Now that we have .NET and the Twilio .NET library installed, we can send an outbound text message from the Twilio phone number we just purchased with a single API request. Open the file in your new project called Program.cs and type or paste in this code sample, replacing the template code that's already there.
1// Install the C# / .NET helper library from twilio.com/docs/csharp/install23using System;4using Twilio;5using Twilio.Rest.Api.V2010.Account;6using System.Threading.Tasks;78class Program {9public static async Task Main(string[] args) {10// Find your Account SID and Auth Token at twilio.com/console11// and set the environment variables. See http://twil.io/secure12string accountSid = Environment.GetEnvironmentVariable("TWILIO_ACCOUNT_SID");13string authToken = Environment.GetEnvironmentVariable("TWILIO_AUTH_TOKEN");1415TwilioClient.Init(accountSid, authToken);1617var message = await MessageResource.CreateAsync(18body: "Join Earth's mightiest heroes. Like Kevin Bacon.",19from: new Twilio.Types.PhoneNumber("+15017122661"),20to: new Twilio.Types.PhoneNumber("+15558675310"));2122Console.WriteLine(message.Body);23}24}
Response
1{2"account_sid": "ACXXXXXXXXXXXXXXXXXXXXXXXXXXXXXXXX",3"api_version": "2010-04-01",4"body": "Join Earth's mightiest heroes. Like Kevin Bacon.",5"date_created": "Thu, 24 Aug 2023 05:01:45 +0000",6"date_sent": "Thu, 24 Aug 2023 05:01:45 +0000",7"date_updated": "Thu, 24 Aug 2023 05:01:45 +0000",8"direction": "outbound-api",9"error_code": null,10"error_message": null,11"from": "+15017122661",12"num_media": "0",13"num_segments": "1",14"price": null,15"price_unit": null,16"messaging_service_sid": "MGaaaaaaaaaaaaaaaaaaaaaaaaaaaaaaaa",17"sid": "SMaaaaaaaaaaaaaaaaaaaaaaaaaaaaaaaa",18"status": "queued",19"subresource_uris": {20"media": "/2010-04-01/Accounts/ACaaaaaaaaaaaaaaaaaaaaaaaaaaaaaaaa/Messages/SMaaaaaaaaaaaaaaaaaaaaaaaaaaaaaaaa/Media.json"21},22"tags": {23"campaign_name": "Spring Sale 2022",24"message_type": "cart_abandoned"25},26"to": "+15558675310",27"uri": "/2010-04-01/Accounts/ACaaaaaaaaaaaaaaaaaaaaaaaaaaaaaaaa/Messages/SMaaaaaaaaaaaaaaaaaaaaaaaaaaaaaaaa.json"28}
You'll need to edit this file a little more before your message will send:
Swap the placeholder values for accountSid and authToken with your personal Twilio credentials. Go to https://www.twilio.com/console and log in. On this page, you'll find your unique Account SID and Auth Token, which you'll need any time you send messages through the Twilio client like this.
Edit Program.cs and replace the values for accountSid and authToken with your unique values.
Danger
It's okay to hardcode your credentials when getting started, but you should use configuration to keep them secret before deploying to production. We recommend using environment variables to store your user secrets.
Remember that SMS-enabled phone number you bought just a few minutes ago? Go ahead and replace the existing from number with that one, making sure to use E.164 formatting:
[+][country code][phone number including area code]
Replace the to phone number with your mobile phone number. This can be any phone number that can receive text messages, but it's a good idea to test with your own phone, so you can see the magic happen! As above, you should use E.164 formatting for this value.
Warning
If you are on a Twilio Trial account, your outgoing SMS messages are limited to phone numbers that you have verified with Twilio. Phone numbers can be verified via your Twilio Console's Verified Caller IDs.
Save your changes and run your project in Visual Studio.
That's it! In a few moments, you should receive an SMS from your Twilio number on your phone.
Are your customers in the U.S. or Canada? You can also send them MMS messages by adding just one line of code. Check out this sending MMS tutorial to see how it's done.
When your Twilio number receives an incoming message, Twilio will send an HTTP request to a server you control. This callback mechanism is known as a webhook. When Twilio sends your application a request, it expects a response in the TwiML XML format telling it how to respond to the message. Let's see how we would build this in C# using ASP.NET MVC for .NET Framework.
In Visual Studio, click "Create a new project":
Select "ASP.NET Web Application (.NET Framework)" from the list of templates:


When prompted, choose "MVC" as the project type:


Following Microsoft's instructions for your version of Visual Studio, find and install the Twilio.AspNet.Mvc package.

In the directory named Controllers, create a new Controller called SmsController.cs. (Right-click on the Controllers folder, then select Add > Controller... > MVC 5 Controller - Empty.)
Paste the following code into SmsController.cs. This creates an action that can handle incoming messages. Be sure to use the entire code sample (note, for example, how the SmsController inherits from TwilioController).
When your phone number receives an incoming message, Twilio will send an HTTP request to your server. This code shows how your server should respond to reply with a text message (using TwiML).
1// Code sample for ASP.NET MVC on .NET Framework 4.6.1+2// In Package Manager, run:3// Install-Package Twilio.AspNet.Mvc -DependencyVersion HighestMinor45using Twilio.AspNet.Common;6using Twilio.AspNet.Mvc;7using Twilio.TwiML;89namespace WebApplication1.Controllers10{11public class SmsController : TwilioController12{13public TwiMLResult Index(SmsRequest incomingMessage)14{15var messagingResponse = new MessagingResponse();16messagingResponse.Message("The copy cat says: " +17incomingMessage.Body);1819return TwiML(messagingResponse);20}21}22}
From Visual Studio, run the application (click the "play" arrow). This should open a web browser with the ASP.NET welcome page showing with a URL something like https://localhost:44360. Note: your port number may be something other than 44360.
We'll use ngrok to set up a tunnel from the public internet to your localhost. This will let us use a public URL as the webhook for your application.
First, download and configure ngrok.
Next, run this command to have ngrok set up a tunnel to your localhost:
ngrok http 44360
This will start an ngrok tunnel. Copy down the Forwarding URL that ends with ngrok.io.
Then, you need to configure your Twilio phone number to call your webhook URL whenever a new message comes in:
- Go to Phone Numbers > Active Numbers in the Twilio Console.
- Select the SMS-enabled Twilio number you want to use.
- For the A MESSAGE COMES IN webhook, enter the ngrok URL you copied down earlier. Append
/smsto the end of the URL.

Make sure your project is running and your ngrok tunnel is running.
With both of those servers running, we're ready for the fun part - testing our new ASP.NET SMS application!
Send an SMS from your mobile phone to your Twilio phone number that's configured with this webhook. Your ASP.NET app will process the text message, and you'll get your response back as an SMS.
Now that you know the basics of sending and receiving SMS and MMS text messages with C# and .NET, you might want to check out these resources.
- REST API documentation
- TwiML reference docs
- Secure your C# / ASP.NET app by validating incoming Twilio requests
Happy hacking!