Twilio Flex Quickstart: Getting Started with Flex Plugin Development
You can extend and modify your Twilio Flex call center instance using the React JavaScript framework.
During this Quickstart, you'll use React to customize your Flex instance by integrating a search engine into the Flex CRM container. This Quickstart only involves copying and pasting some React code. To learn more, see the official React Docs.
At the end of this Quickstart, you'll know how to develop a Flex plugin, test it locally, and upload your changes to a Twilio-hosted Flex instance. Once you've seen basic changes you can make with React, you can start to make more extensive modifications to your contact center instance.
In this Quickstart, we will:
- Create a new Flex hosted instance
- Install the Flex Plugins CLI
- Walk through the plugin creation steps locally
- Develop your plugins locally
- Deploy your plugins and enable your plugin on your Flex application
- Verify your changes in the Twilio hosted call center instance
Prefer other styles of learning? See our collection of Flex video tutorials and demos.
Before you start working on plugins for Flex, you'll need a cloud call center instance to apply them on. Let's create a new Flex instance now.
Info
If you already have a Twilio Flex instance you'd like to customize, feel free to skip ahead to the plugin prerequisites.
Before you can work with Flex, you'll need to sign up for a Twilio account or sign into your existing account.
-
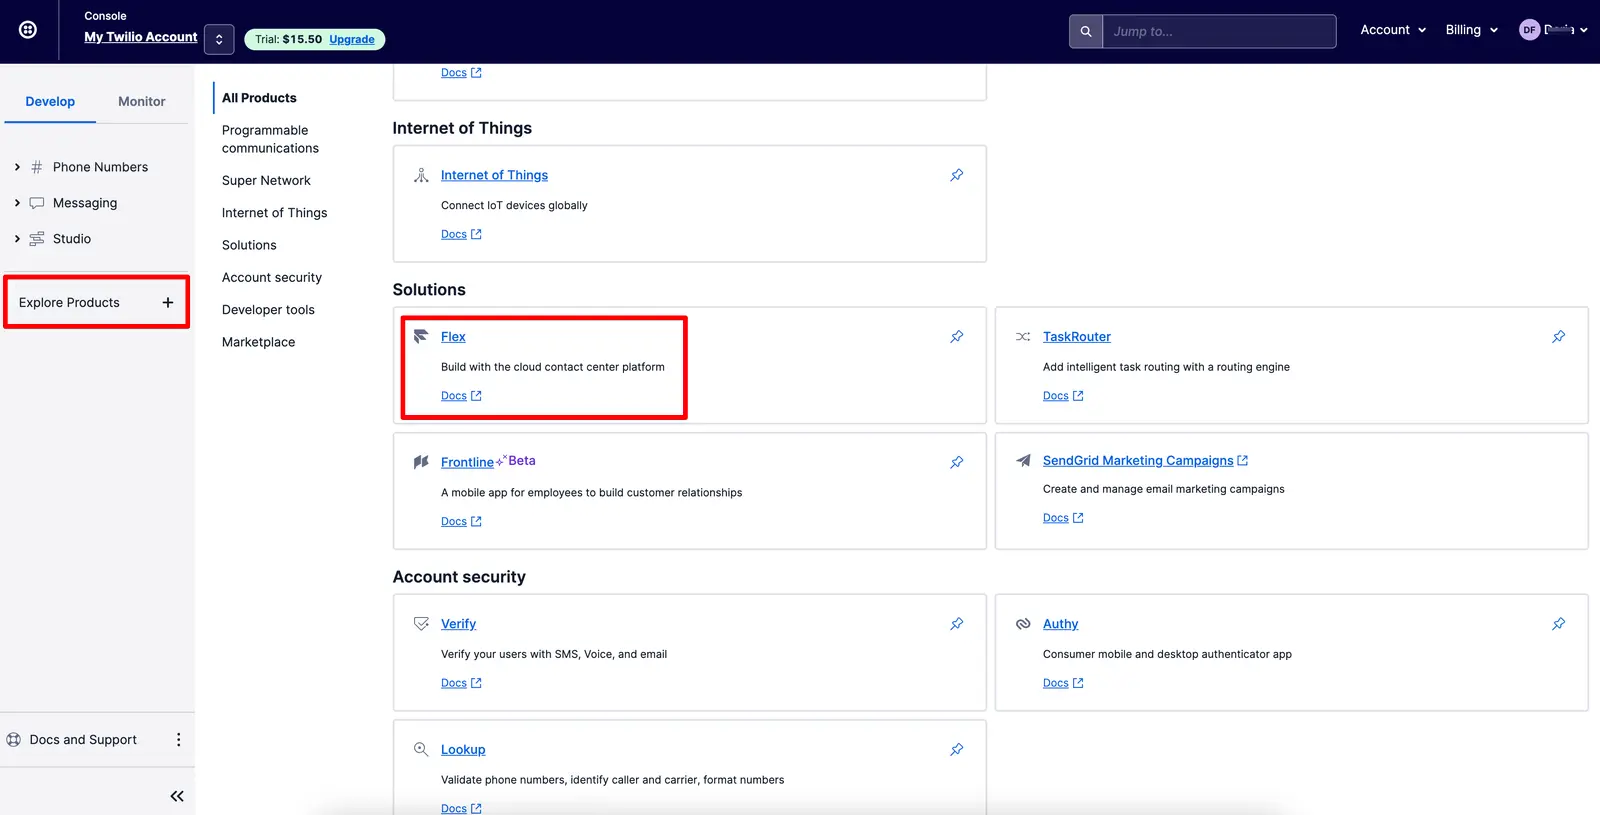
Once in the console, navigate to the Flex product:
-
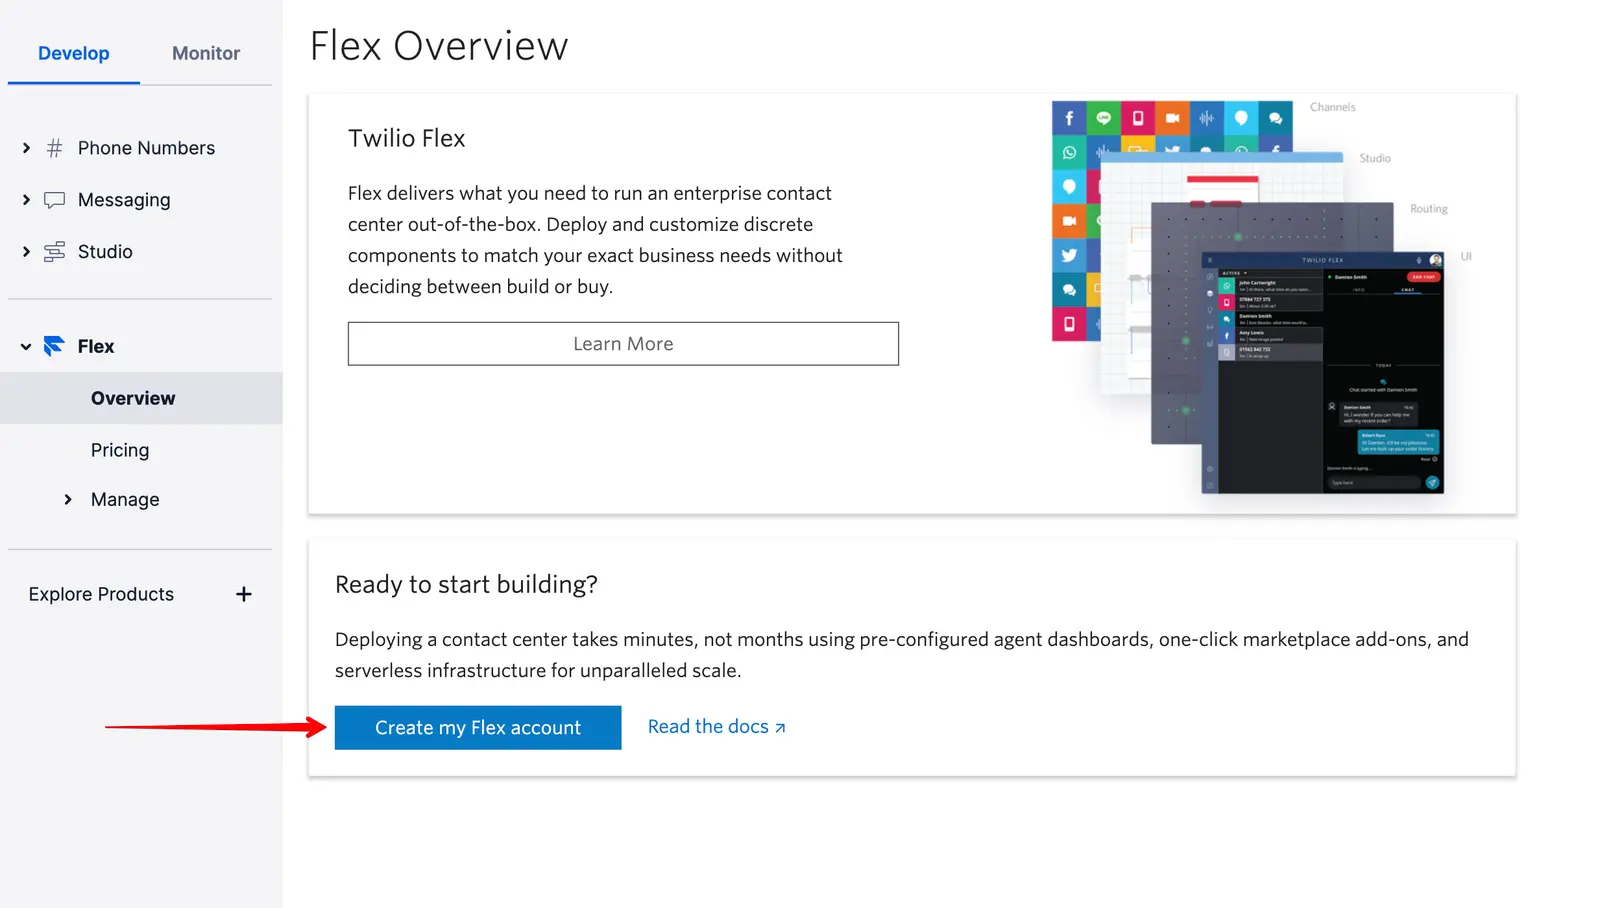
Now, select 'Create My Flex Account':
-
Give your new project a name and verify a phone number
-
Flex will run through an initialization process to get your new account configured
And that's all you need for now. Let it go through its setup, and you'll get a vanilla hosted Flex instance for us to modify.
Before you can start creating Flex plugins with React, you'll need a few things in place.
-
A Twilio account with a Flex environment provisioned (the previous section)
-
npm version 6.0.0 installed (type
npm -vin your terminal to check) -
A Node.js long-term-support (LTS) version installed (type
node -vin your terminal to check):- React v16 recommended for Flex UI 1.x
- React v17 recommended for Flex UI 2.x
-
Twilio CLI installed on your machine. We recommend installing the latest version of the Twilio CLI.
In order to run the CLI commands, on your Flex application run the following command:
twilio login
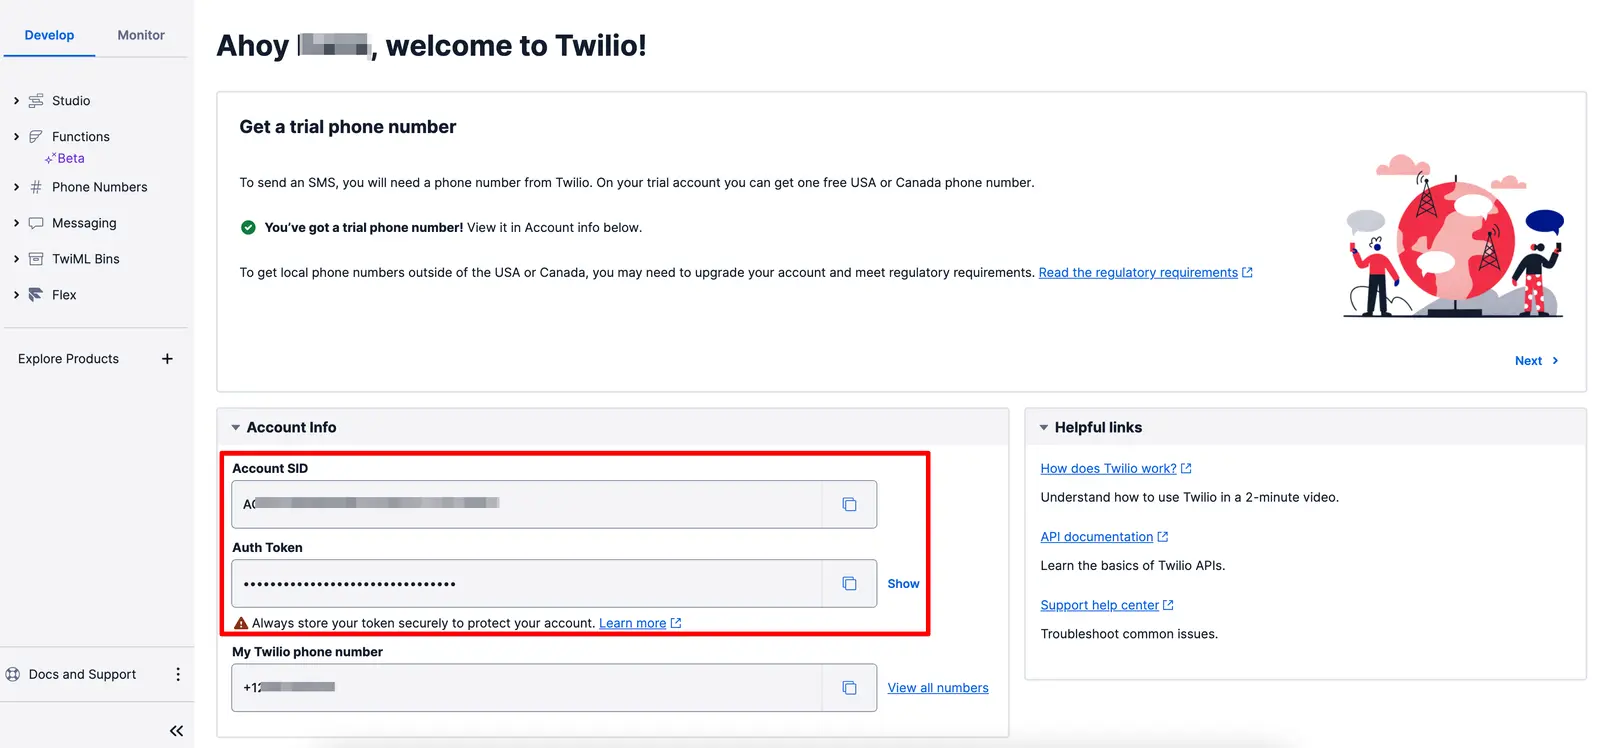
You will be prompted for your Account SID and Auth Token, both of which you can find in the Twilio Console Dashboard.
Once you have logged in successfully, all the subsequent CLI commands will use the Flex account you logged in with.
Learn more about using multiple accounts by visiting the Twilio CLI General Usage Guide.
Once you have NPM and Node of the proper version, you're ready to develop your Flex plugin. The Flex Plugins CLI is the easiest way to start building Flex plugins. It gives you a clean environment in which to develop your Flex plugin as well as tools to build and deploy your plugin. With the Flex Plugins CLI, you know that your Flex plugins will be modular - that is, Plugin A won't interfere with the behavior of Plugin B.
Follow the steps in Plugins CLI documentation for installation.
In your terminal, run the following commands to set up a sample Flex plugin:
1# Now we can start with a template plugin for Flex 2.0 with the create command2twilio flex:plugins:create plugin-sample --install34# Or if you prefer a typescript project run5twilio flex:plugins:create plugin-sample --install --typescript
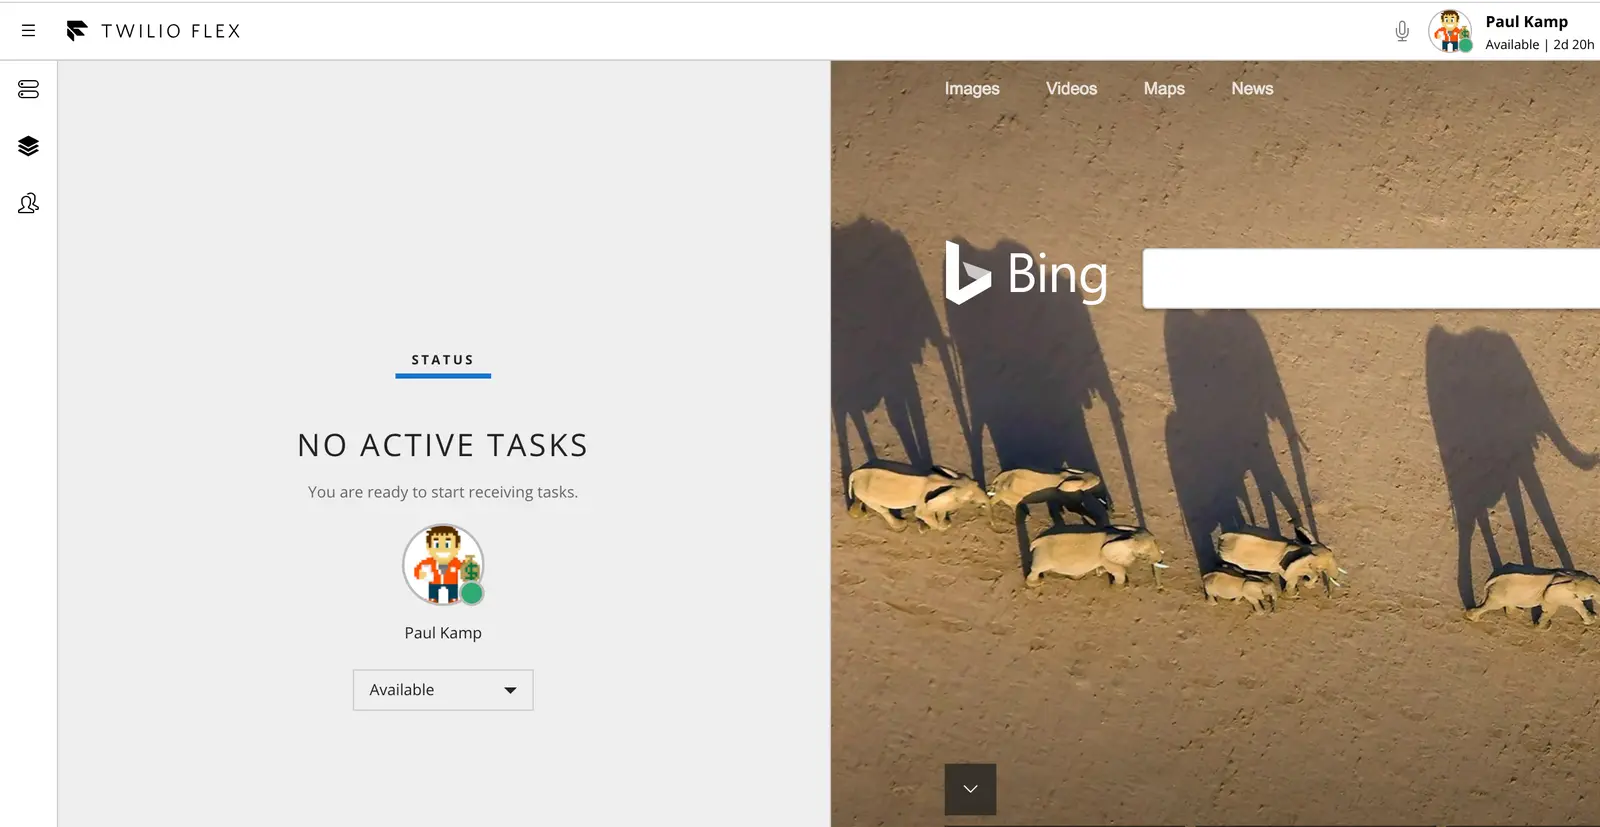
Once you have created your plugin development environment, you can navigate into your plugin's code directory and start Flex:
1cd plugin-sample2twilio flex:plugins:start
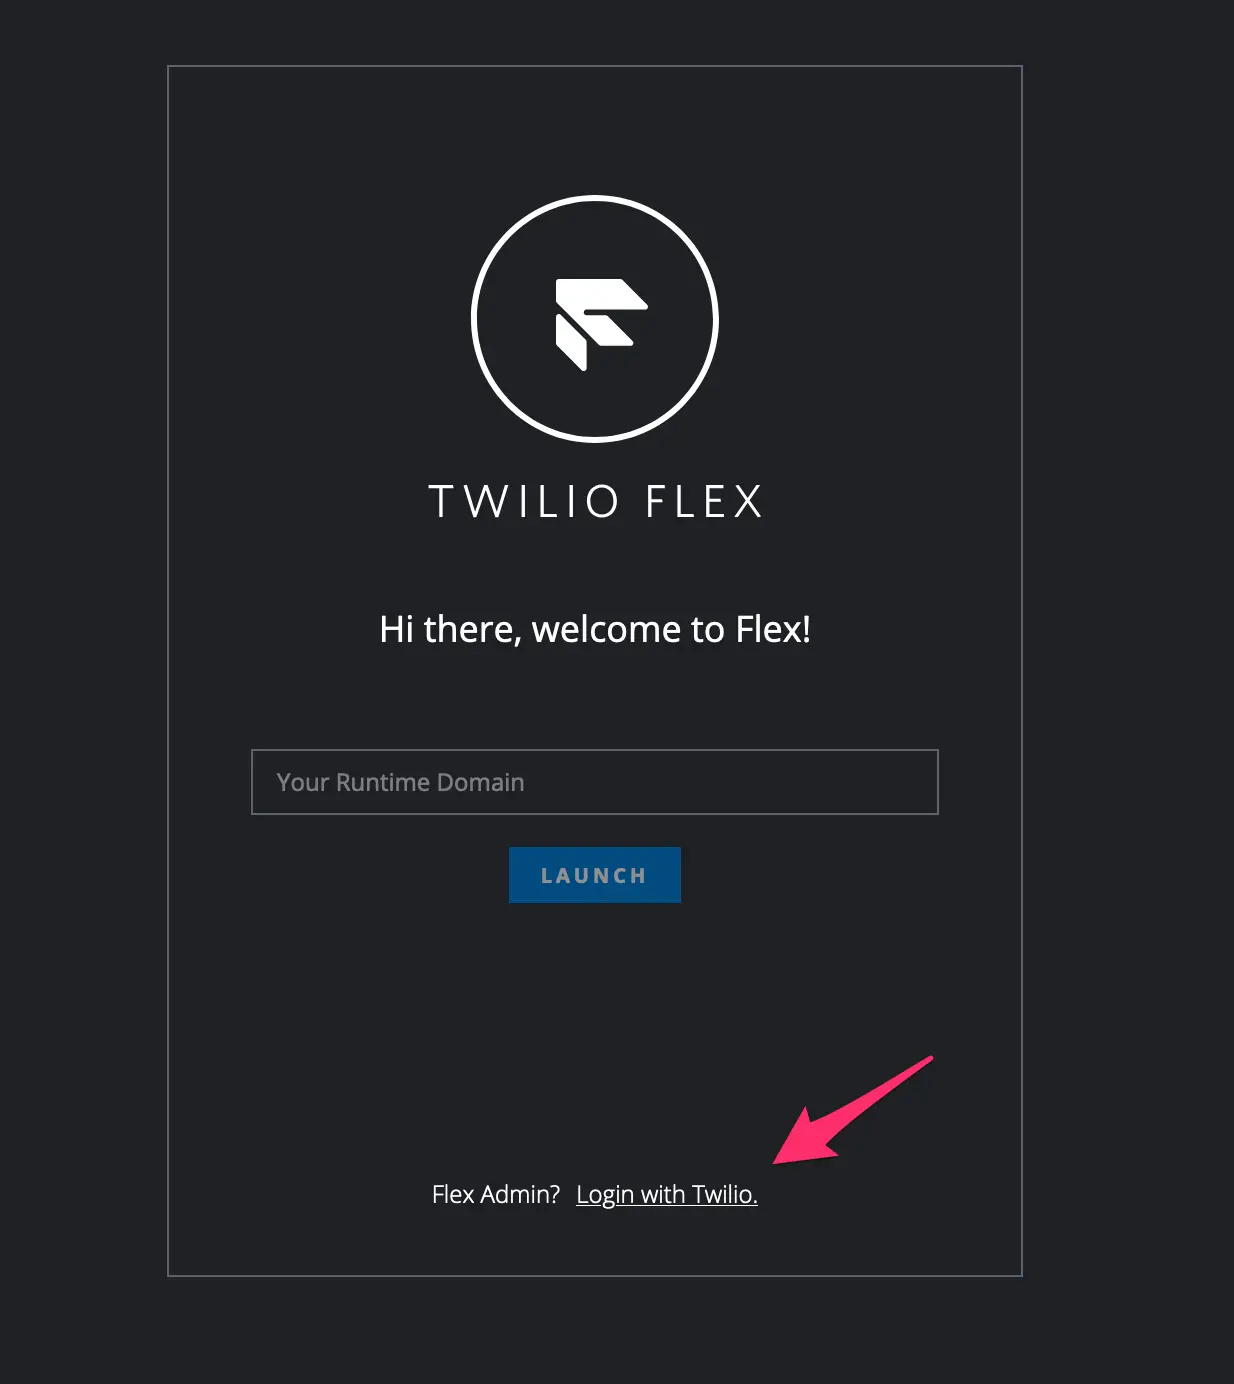
A Flex instance should now be running on localhost:3000. You might need to log in to your Flex instance by clicking on the "Login with Twilio" link and logging in with your Twilio credentials.
SSO login requires additional configuration
If you need to log in to Flex using SSO instead, make sure that you first configure the appConfig.js file to support localhost as one of the redirectUrl values.
Open your favorite text editor and change the directory to the plugin folder we just built. At the moment, our plugin just adds a black bar to the top of the task list - but we're going to configure the CRM to be an instance of the Bing search engine instead.
-
Navigate into the folder created for
plugin-sample(or the name you picked) -
Open the file
src/SamplePlugin.js -
Replace the code in that file with the following
1import React from "react"2import { FlexPlugin } from "@twilio/flex-plugin"34import CustomTaskList from "./components/CustomTaskList/CustomTaskList"56const PLUGIN_NAME = "SamplePlugin"78export default class SamplePlugin extends FlexPlugin {9constructor() {10super(PLUGIN_NAME)11}1213/**14* This code is run when your plugin is being started15* Use this to modify any UI components or attach to the actions framework16*17* @param flex { typeof import('@twilio/flex-ui') }18*/19async init(flex, manager) {20flex.CRMContainer.defaultProps.uriCallback = (task) => {21return task22? `https://www.bing.com/search?q=${task.attributes.name}`23: "https://www.bing.com"24}25}26} -
Save it
-
Your browser will automatically reload. Now your instance should look like the following:
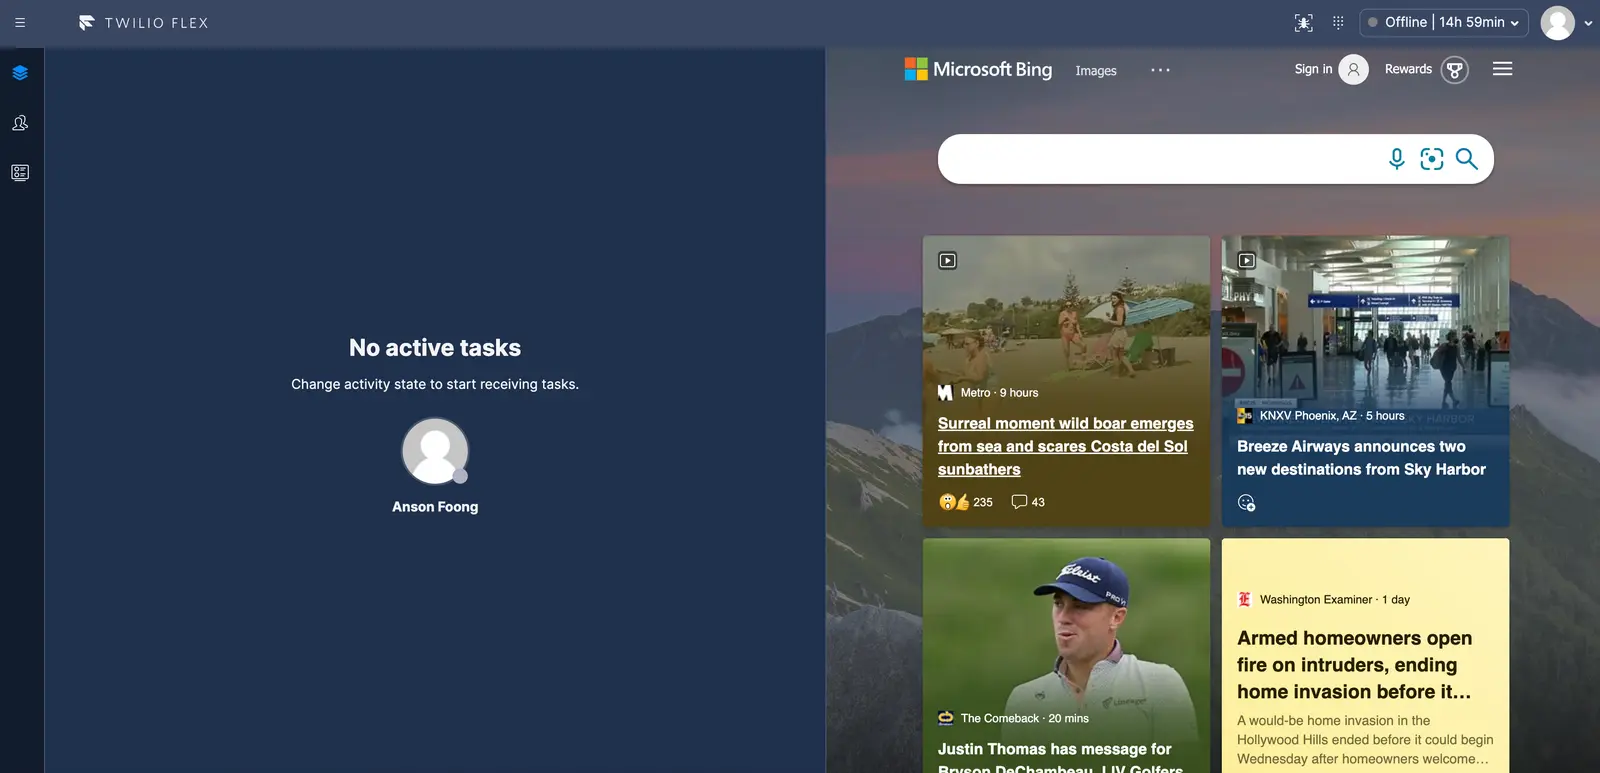
-
(Optional) Text in and see if there are any Bing results for your phone number!
You might notice that all we changed was a couple of lines of code:
1const options = { sortOrder: -1 };2flex.AgentDesktopView.Panel1.Content.add(<CustomTaskList key="SamplePlugin-component" />, options);is replaced by
1flex.CRMContainer.defaultProps.uriCallback = (task) => {2return task3? `https://www.bing.com/search?q=${task.attributes.name}`4: "https://www.bing.com"5}This tells Flex to target the
CRMContainer(instead of theCustomTaskList). Instead of adding a component to theCustomTaskList, we update the URI that theCRMContaineruses as a default prop to render its contents. In this case, we also add a bit of logic to make the container dynamic. We check to see if there's an active task. If there is an active task, we search for the task's name attribute, otherwise, we just show thehttps://bing.comlanding page.Flex allows you to add, remove, and replace components so that you can tailor your contact center to your business needs. As you build more complex plugins, your workflow will remain similar. When you save files, your environment will reload and you can see the changes locally. To use the Twilio Paste UX library in your plugins, please see Use Twilio Paste with a Flex Plugin.
Next up, you'll build the plugin and deploy it to your hosted instance.
You need to deploy your plugin so that your plugin can be enabled on your live Flex Application. The Flex Plugins CLI uses the Functions & Assets API to upload your plugin directly from your CLI.
-
In your terminal, within the
plugin-sampledirectory we created, runtwilio flex:plugins:deploy --major --changelog "Adding Bing as search engine" --description "First Plugin on Flex" -
In order to enable your plugin, run
twilio flex:plugins:release --name "First Plugin Release" --description "Enabling Plugin Sample" --plugin plugin-sample@1.0.0 -
Reload your Flex Agent Dashboard. You should now see the new Bing-powered CRM panel!
Refer to our guide on how to deploy your plugins if you are deploying plugins to multiple accounts.
By default, Flex only includes sourcemaps in production builds. Flex doesn't include sourcemaps in development builds to reduce build time and keep the bundle size smaller. However, if you want to make sourcemaps available in development to avoid warnings, you can override this setting in your plugin's webpack configuration.
Below is an example of how to override the Sass-loader sourcemap setting to true:
1const updateSassModuleRules = (config) => {2// SASS - COMPATIBILITY WITH TWILIO BASE CONFIG FOR DEVELOPMENT3const { oneOf } = config.module.rules.find((rule) => rule['oneOf']);4if (!oneOf) return config;5const newOneOf = oneOf.map((rule) => {6const constainsStyleLoader = rule.use?.some((loader) => loader.includes('style-loader'));7if (constainsStyleLoader) {8const updatedLoaders = rule.use.map((loader) => {9if (!loader?.options) return loader;10return {11...loader,12options: {13...loader.options,14sourceMap: true,15},16};17});18return {19...rule,20use: updatedLoaders,21};22}23return rule;24});25const updatedRules = {26module: {27rules: [28{29oneOf: newOneOf,30},31],32},33};34return mergeWithRules({35module: {36rules: {37oneOf: 'replace',38},39},40})(config, updatedRules);41};
You'll then export this from the overridden webpack configuration:
1module.exports = {2...{other rules if any}3updateSassModuleRules,4};
You now know how to build Flex Contact Center plugins using React, test them locally, then upload them to the cloud. You have the scaffolding to build whatever plugins you desire and see them reflected almost instantly in your call center instance.
Depending on your goals, we have a few paths you might want to follow next. Either explore more around plugin development with Flex and React or visit some of our other Flex Quickstarts.
We can't wait to call what you build!
- Building on Flex using newer versions of React
- Introduction to the Flex-UI Component Library
- Using the Plugins Dashboard to manage Plugins